Category: Howtos

On this category, I post various HowTo articles and setup tutorials for different FOS Sofwares. During my spare time, I learn how to install everything, from any Linux-based applications to server apps which are intended for Cloud VPS operation. Once learned… I document it, write the guide and post it on this section of the site. This site also serve as my personal reference site, I tend to forget how I setup something, especially when haven’t used it for a while. So I resort to my own blog post and read my own guide to install an App. I work as part-time virtual tech assistant on various Freelancing web site and that would mean that I have real-world experience in setting up sever applications or FOSS. This would mean that I’ve handled several Cloud VPS and other Linux-based softwares, in a professional level. And yes, I am a self-taught tech dude as mentioned in my About Chubbable’s page, and I am making small money off of it. I setup and configure servers for production environment, and whatever I learned and experienced from it shall be shared and posted on this Blog.
  • Unicenta 3.91.x on Ubuntu 16.04 Desktop (Xenial Xerus) Installation Guide

    Unicenta 3.91.x on Ubuntu 16.04 Desktop (Xenial Xerus) Installation Guide

    Since the time I’ve posted the Unicenta 3.8 Installation guide, it’s been long that I haven’t updated the post. It took me almost two years to update the guide, due to busy schedules. Well, now I got the opportunity to write the guide for this open source point of sale system called Unicenta POS 3.91.

    Jump Links

    Also Read: – Things you need to know when building your own POS System. – Installing uniCenta 4.x.x on Linuxmint 19


    If you’re looking to build your own Linux POS System, then follow this Ubuntu 16.04 guide to get you started. You don’t need the latest in PC Hardware, all you need is any computer with at least 512MB of memory. You could use those old Pentium IV based PCs and just throw in some RAM, maybe two sticks of 256MB or single stick of 512MB Ram, then load up Ubuntu and voila! You could now setup your own free POS system, that is based on Linux.

    Before you start with the guide, I require you to install Ubuntu 16.04 Desktop version first. You can either use a physical machine or a Virtual Machine, it’s your choice. But of course, you have to use physical machine for your production environment.

    There’s one thing I need you to take note of, I’m not an expert in this field, but I tell you what, I have real-world experiences setting up this kind of thing professionally in a production environment. And guess what? I just learned all this by myself. Yes, that’s a fact!

    Everything can be learned, so be patient and follow through this guide step-by-step.

    Step-by-step Guide on Installing Unicenta 3.91 on Ubuntu 16.04 Desktop

    Using Ubuntu 16.04 with Unicenta requires a bit of Linux terminal knowledge. You need to understand some of the commands used in this guide, you could lookup Google for this command if you wanted to learn more about it.

    The following commands will be used in this guide:

    • cp – the copy command
    • mv – move file/directory command
    • chmod – set file/folder permission
    • nano – to launch the nano text editor

    Things Needed for the Linux POS Setup

    • Ubuntu Desktop 16.04 (32 or 64-bit), 64-bit shall be use for this guide.
    • Unicenta POS 3.91.x.
    • VirtualBox or VMWare for the virtual machine, only if you wanted to use a guest machine to load up Ubuntu Desktop.
    • Java JRE – for your specific Ubuntu architecture (32/64-bit).

    Procedures

    I like to mention again in this section that I’ll be using Ubuntu Desktop 16.04 64-bit version and Unicenta 3.91.3. So, to easily follow on this guide, I highly recommend that you should use the same version and architecture. Once you learned how to do this, then you could choose to use any version you want. In addition to this, using the same setup as mine, will let you copy/paste the command or copy part of it and make necessary adjustment.

    Also take note of this YouTube video link that you could use as visual reference along with this guide.

    Step 1: Launch Ubuntu & Download Unicenta

    Fire up Ubuntu Desktop 16.04 and download the latest version of Unicenta POS. At the time of writing this guide, version 3.91.3 is the latest.

    Note: For some reason unknown yet to me, creating a launcher or desktop shortcut for start.sh is not working. I haven’t dig further due to lack of time, but I managed to make a work-around. If you have read my Unicenta 3.8 installation guide, creating a Desktop Launcher is very easy and flawless.

    Step 2: Download Java JRE and Install

    As of September 30, 2016, the latest version of Java Runtime Environment is 8u101 – which in this case, will be used.

    1. Download Java JRE – for your specific Ubuntu architecture (32/64-bit). But in this case, I’m gonna be using jre-8u101-linux-x64.tar.gz.

      Reference Image: Screenshot - Download Page for Java JRE

      When using Firefox in Ubuntu, the default download location for files is in /home/your-user-name/Downloads. To quickly access this location using terminal is by invoking this command: cd ~/Downloads then type in ls -l to list your downloaded items. jre-8u101-linux-x64.tar.gz should be listed.

    2. Extract jre-8u101-linux-x64.tar.gz

      From commandline, type: tar zxvf jre-8u101-linux-x64.tar.gz

      If you do this while on Downloads directory, then the extracted files is in that directory.

      In this case, the extracted directory is named jre1.8.0_101

      Reference Image:

      [caption id="attachment_2258" align="aligncenter" width="765"]Screenshot - Java JRE Extracted Screenshot – Java JRE Extracted [/caption]

    3. To install

      Move jre1.8.0_101 to /opt/ directory.

      sudo mv jre1.8.0_101/ /opt/

      To verify, type:

      ls /opt/

      You should see jre1.8.0_101 listed there.

      Then type:

      sudo update-alternatives --install /usr/bin/java java /opt/jre1.8.0_101/bin/java 110
      

      Sample output (actual screen output in this case):

      update-alternatives: using /opt/jre1.8.0_101/bin/java to provide /usr/bin/java (java) in auto mode
      

      Next, type: sudo update-alternatives --config java

      If only single version of JRE is installed, then the expected output is:

      There is only one alternative in link group java (providing /usr/bin/java):
      /opt/jre1.8.0_101/bin/java
      Nothing to configure.  

      Otherwise, a prompt will ask what version to use.

    4. Set environment so users can use your configured Java JRE location

      sudo nano /etc/environment

      The above command will bring up Nano Text Editor and will allow you to edit /etc/environment file.

      Expected screen output should be:

      PATH="/usr/local/sbin:/usr/local/bin:/usr/sbin:/usr/bin:/sbin:/bin:/usr/games:/usr/local/games"

      Now, below that text, enter:

      JAVA_HOME="/opt/jre1.8.0_101"

      So it will look like this:

      PATH="/usr/local/sbin:/usr/local/bin:/usr/sbin:/usr/bin:/sbin:/bin:/usr/games:/usr/local/games"
      JAVA_HOME="/opt/jre1.8.0_101"

      Then type ctrl + o then enter key to save. ctrl + x to exit the text editor.

      Next, type:

      source /etc/environment

      No text output will appear, but to verify, type:

      echo $JAVA_HOME

      Expected output in this case is:

      /opt/jre1.8.0_101

      If you see the above output, then that’s great! You have successfully installed Java JRE for Unicenta 3.9. Next step is to reboot your system. Just type sudo reboot from commandline, to quickly do a reboot.

      Once rebooted, proceed to Unicenta 3.91 installation steps below.

    Step 3: Download and Install Unicenta POS 3.91.x

    If you don’t have it yet, download Unicenta POS 3.91.x to your preferred location inside your Ubuntu file system.

    Using Firefox under Ubuntu 16.04, by default, is configured to download all files in /home/your-user-name/Downloads. So check this directory for the downloaded files. Unlike Unicenta POS 3.8 which came in an archived format (zip), version 3.91.x is a .run file.

    In this case, my downloaded file name is: unicentaopos-3.91.3-linux-x64-installer.run

    Now, before you can run or execute the file, you must first set the file permission to executable. For this, you can either use the commandline or the GUI, when installing Unicenta 3.91.

    Note: This guide on Unicenta 3.91 installation or setup under Ubuntu will also work under Linuxmint

    3.1. Using the commandline is like so, open terminal do the following:

    1. change directory to Downloads directory or your chosen download location, in this case, I typed; cd ~/Downloads and ls. After invoking this command, you should see the file unicentaopos-3.91.3-linux-x64-installer.run, with white colored text – this file name may not be the case in the future.

      Then set execute permission:

      chmod a+x unicentaopos-3.91.3-linux-x64-installer.run

      To verify, type:

      ls while still in the Downloads directory, you should notice that the text color is now green.

      OR if you type ls -l, you’ll see that file permission have been set to executable by observing the x – which means executable by file OWNER-GROUP-OTHERS, i.e x-x-x

      Sample output:

      -rwxrwxr-x 1 chubbable chubbable 99352965 Sep 30 19:28 unicentaopos-3.91.3-linux-x64-installer.run
      
    2. Execute the Installer File

      While still in Downloads directory, run the installer file unicentaopos-3.91.3-linux-x64-installer.run, and when asked where it should be installed, choose the /opt directory.

      To run/execute the installer, do the following:

      sudo ./unicentaopos-3.91.3-linux-x64-installer.run --mode text

      You’ll then be asked to choose the language you wanted Unicenta to use. The default selected option is English, which is 13 from the selection menu. This is by default selected, you just need to press enter key here if you’re going to use English. Else, enter the number specified for the language you wanted to use.

      Sample output:

      [41] Traditional Chinese - 繁体中文
      [42] Turkish - Türkçe
      [43] Turkmen - Türkmençe
      [44] Valencian - Valencià
      [45] Vietnamese - Tiếng Việt
      [46] Welsh - Cymraeg
      Please choose an option [13] :
      

      Next, you’ll be asked to choose which JVM to use, sample output in my case:

      Please choose an option [13] :
      
      JVM Selection
      
      Please select the Java(tm) Runtime to use
      [1] Oracle/Sun 1.8.0 64-bit /usr/bin/java
      [2] Oracle/Sun 1.8.0 64-bit /opt/jre1.8.0_101/bin/java
      
      Please choose an option [1] :
      

      In my case, I’d choose 2, so I typed 2 and press the enter key to proceed.

      Next prompt would be:

      Welcome to the uniCenta oPOS Setup Wizard.


      Please read the following License Agreement. You must accept the terms of this agreement before continuing with the installation.

      Press [Enter] to continue:

      To accept the LA, just hit enter key several times until it prompts you to:

      Do you accept this license? [y/n]:

      Press y and enter.

      Next prompt would be the installation location:

      Please specify the directory where uniCenta oPOS will be installed.
      
      Installation Directory [/opt/unicentaopos-3.91.3]
      

      Press Enter key to accept and use the suggested location, which is [/opt/unicentaopos-3.91.3 in this case. When asked of "Do you want to continue", of course you would say yes, so hit y key and enter.

      Setup will take a breeze, see sample output below:

      Reference Image:

      [caption id="attachment_2260" align="aligncenter" width="814"]Screenshot - Unicenta Installation using Ubuntu Commandline Screenshot – Unicenta Installation using Ubuntu Commandline[/caption]

    3. Running ang Testing Unicenta 3.91

      While still in commandline, navigate to /opt/unicentaopos-3.91.3 directory. This is where we installed Unicenta during the commanline-based installation. To go to this location, type: cd /opt/unicentaopos-3.91.3 then type ls -l. You should see files like; start.sh, configure.sh and migrate.sh. You need to set file permission for these files, and you should do chmod a+x *.sh for this.

      Once done, you should now be able to execute/run Unicenta 3.91 on Ubuntu 16.04.

      To run/execute, just type ./start.sh.

      NOTE: It may take a while for the first run, so be patient and wait for the splash screen to show. But you must answer and click Yes for the first prompt.

      When you see the screen like the one blow, then congratulations! You did it!

      Reference Image:

      [caption id="attachment_2261" align="aligncenter" width="1022"]Screenshot - Unicenta 3.91 Successfully Installed in Ubuntu 16.04 Screenshot – Unicenta 3.9 Successfully Installed in Ubuntu 16.04[/caption]

    3.2. Using the File Manager:

    1. Using the File Manager, navigate to Downloads folder (in this case), then right click on the file. Then choose Properties, then Permissions. Tick the check box labeled Allow executing file as program, and close the dialog box.

      Reference Image: [caption id="attachment_2259" align="aligncenter" width="476"]Screenshot - Set Permission for Unicenta Installer Screenshot – Set Permission for Unicenta Installer[/caption]

    2. Next run/execute the installer file.

      You could double click or right-click then choose RUN.

      It may take a while to open during the first time, so please be patient and wait for dialogue box or pop-up window. Choose language, JVM path, accept license agreement, and installation directory and follow on. When using the GUI/File Manager to install Unicenta 3.9, the default selected location is your Home Directory. That is – /home/your-user-name/unicentaopos-3.91.3. I recommend that you choose the /opt location for multi-user/multi-login setup.

    Step 4: Create Launcher for Unicenta 3.91 in Ubuntu 16.04

    The old and known way of creating a launcher, under Linux, no longer works this time. I wasn’t able yet to search on this, why the launcher doesn’t work. Launcher creation for older Unicenta version was mentioned in this post. Jump to Linux based installation section.

    Creating the launcher in this version of Unicenta, and as a work-around, involves additional step to what was mentioned in my older post. This time, you need to create a simple .sh file inside the Unicenta 3.91 installation directory. Then make reference to this file when creating the Desktop Launcher.

    Procedure – Using Commandline

    1. Open Terminal and type: nano ~/Desktop/Unicenta.desktop

    2. Copy/paste the following:

      [Desktop Entry]
      Encoding=UTF-8 
      Version=1.0 
      Name=Unicenta
      Comment=Fires up Unicenta oPOS
      Type=Application
      Exec=/opt/unicentaopos-3.91.3/launcher.sh
      Icon=/opt/unicentaopos-3.91.3/unicentaopos.ico
      

      Save the file: ctlr + o and press enter key, then exit the editor, ctrl + x.

      Set file permission:

      chmod a+x ~/Desktop/Unicenta.desktop

      If you’re following the whole guide, you observed that /opt/unicentaopos-3.91.3 is the installation directory. If you came to this part from Search Engine, then make the necessary adjustment to path.

    1. Solution for Desktop Shortcut Not Working

      Open a terminal then type: sudo nano /opt/unicentaopos-3.91.3/launcher.sh.

      Then copy/paste the following:

      #!/bin/bash
      cd /opt/unicentaopos-3.91.3
      ./start.sh

      Save the file and exit the editor.

      1. Set file permission

        sudo chmod a+x /opt/unicentaopos-3.91.3/launcher.sh

      2. Test the Unicenta 3.91 Launcher, by double clicking on it, or right-click then open. Take note, that it may take a while to start when it’s first time to launch.

    Procedure – Using GUI

    1. Create the Unicenta.desktop file by right-clicking on the Desktop, then choose New Document, then Empty Document. Make sure you name the file with .desktop extension. Then double click on it to launch the text editor.

    2. Copy/paste and save

      [Desktop Entry]
      Encoding=UTF-8
      Version=1.0
      Name=Unicenta
      Comment=Fires up Unicenta oPOS
      Type=Application
      Exec=/opt/unicentaopos-3.91.3/launcher.sh
      Icon=/opt/unicentaopos-3.91.3/unicentaopos.ico
    3. Make the file executable – right-click on Unicenta.desktop file and choose properties, then permission, then tick the checkbox Allow executing file as program. And that would be it. Now test the launcher, and pray it would work. But it should work if you followed carefully.

    Step 5: Creating an Autostart on Login Launcher (optional)

    If you want to make Unicenta launch automatically upon user login, then you need this extra step. It’s a very simple step and will only require a minute of your time.

    1. Click on the the Search your computer button.
    2. Type Startup to locate the startup menu.
    3. Click Startup Application.
    4. Click Add button.
    5. Enter Unicenta Auto Launch under Name field.
    6. Under Command field, browse to your Unicenta Installation Path, and then choose launcher.sh – this is the file created to get around the "Shortcut Not Working" issue.
    7. Under Comment field, you enter Autolaunch Unicenta upon login.
    8. Finally, click the Add button, then close the dialog box.

    Now, reboot your system to test. Unicenta should be able to start automatically upon user login.

    Reference Image:

    [caption id="attachment_2268" align="aligncenter" width="511"]Screenshot - Initial step in creating Unicenta Auto Launch on Login Initial step in creating Unicenta Auto Launch on Login[/caption]

    It’s a Wrap!

    If you followed this guide carefully, then you should be able to launch your instance of Unicenta 3.91. If not, then feel free to ask help using the comment section below.

    In case you find this guide too technical for you, or you don’t have the time to do this by yourself but have the proper funds, then I would suggest that you try those readily available system on the cloud. It’s called Cloud POS System.

    No instruction yet for Windows, and I don’t have any future plans. Why so? Because I don’t have Windows installed on my system. I can’t afford the License.

    For Windows 7, 8, 10 users out there, I highly recommend that you use Ubuntu or Linuxmint for your POS system. Why so? Because installing Unicenta on Linux is way more quicker than on Windows. In addition to this, you don’t have to spend so much money just to run a POS software. It can run on Linux, which is free, so why not use Unicenta with Linux instead.

  • Step by Step Guide: Installing osTicket Locally on Windows or Ubuntu 16.04

    Step by Step Guide: Installing osTicket Locally on Windows or Ubuntu 16.04

    In this step-by-step guide, I will show how you would install osTicket (the free help desk software) locally, under Windows using a portable Web Server called USBWebserver. In case you didn’t know yet, osTicket is a free and open source helpdesk software and help ticketing system, similar (but not entirely the same) to platforms like; Zendesk, Freshdesk, Groove and Ladesk. Installing it under Windows should be easy and quick, but NOT that easy under Ubuntu 16.04. In this post, both Windows and Ubuntu local install are covered.

    Jump Links

    Overview

    osTicket, the open-source help desk platform, is widely recognized as a free helpdesk and support ticket system. It’s known for its flexibility and reliability among help ticket systems available online.

    You can host it on-premise using your intranet server or opt for Enhancesoft’s cloud-hosted solution (paid). Self-hosting is also possible via platforms like Digital Ocean or Amazon AWS.

    osTicket is developed by Enhancesoft, a U.S.-based software company. It’s been downloaded over 1.4 million times and used in more than 200 countries.

    As of version v1.9.14, some release highlights include:

    Enhancements:

    • User data updates during CSV import
    • Consistent agent formatting and sorting
    • Memcache backend support
    • Email domain validation via DNS
    • Sticky ticket queue selections

    Fixes & Improvements:

    • Charset mapping for ISO-8859-1
    • Handling of organization and user custom data
    • Email threading and missing headers
    • PDF export crash prevention
    • Improved bounce detection and i18n fixes
    • Windows® deployment and upgrade stability

    Full release notes here

    System Requirements

    osTicket has a small footprint, any modern web server setup will work. To install and run it, as of version 1.9.8, the following components are required;

    1. Web Server: Apache 2.4 or later
    2. PHP 5.6 (v7.0 is not supported yet – as October 2016)
    3. MySQL 5 (or later)
    4. A minimum server RAM of 1024 MB

    Procedures – Windows Based

    Installing osTicket on a Windows-based web server (WAMP) requires downloading a portable stack called USBWebserver. It works with Windows XP, 7, 8, and 10. You could also use other stacks like XAMPP, but for this guide, USBWebserver will be the focus.

    NOTE: Use this setup for testing only—not for production environments. The official osTicket demo has a 14-day limit, but this method lets you explore without restriction.

    Step 1: Download and Configure USBWebserver

    • Extract and run the software.
    • Change the Apache port from 8080 to 80, unless another server is running.
    • Set the Root Dir to {root}/osticket.

    Screenshot – Installing osTicket locally on Windows

    Step 2: Create the Installation Folder

    • Inside the USBWebserver 8.x directory, create a folder named osticket.

    Step 3: Extract osTicket Files

    • Extract osTicket-v1.9.14.zip or whatever version you’ve downloaded.
    • Copy all contents from the upload folder into the osticket folder.
    • Duplicate ost-sampleconfig.php and rename it as ost-config.php.

    💡 TIP: On Windows, hold Ctrl and drag the file to duplicate it in the same folder.

    Step 4: Launch USBWebserver

    • Run usbwebserver.exe.
    • Both Apache and MySQL indicators should turn green.
    • If not, double-check your folder path and port settings.

    Step 5: Open osTicket in a Browser

    • Launch Chrome or your preferred browser.
    • Visit http://localhost and ensure you see the osTicket installer interface.

    Screenshot – osTicket Installation Wizard

    Before continuing, let’s create a database.

    Step 6: Create a MySQL Database

    • Visit http://localhost/phpmyadmin.
    • Login:
      • Username: root
      • Password: usbw
    • Create a database named osticket, and use the same name for the user.

    🎥 Video Demo

    Step 7: Launch the Installer Wizard

    • Go back to http://localhost.
    • The wizard should load and show all system checks.
    • If you see a config file error, make sure you completed Step 3 properly.

    Screenshot – Config File Missing

    Step 8: Complete Installation Fields

    Fill out the form with your preferred settings. For database:

    • MySQL Database: osticket
    • MySQL Username: osticket
    • MySQL Password: your-own-password

    Note: Admin Email and System Email should be different.

    Once done, click Continue.

    Step 9: Final Steps

    You should land on the "Congratulations!" page. osTicket is installed!

    Screenshot – osTicket Installed

    You can now run osTicket from any Windows computer—just plug in your USB, launch usbwebserver.exe, and you’re set!


    Next Steps

    ➡️ Continue to Ubuntu Install Guide →

    Jump Links

    Ubuntu 16.04: Installation Summary

    Procedures – Ubuntu Based (LAMP Stack)

    This section of the guide requires you to have an instance of Ubuntu 16.04 LTS (Xenial Xerius), Desktop or Server edition, it’s your choice. But for production or live environment, you should use Ubuntu Server edition.

    To setup osTicket on Ubuntu 16.04 Desktop or Server edition, you also need the following requirements.

    Requirements For Ubuntu 16.04

    1. Web Server: Apache 2.4 or later
    2. PHP 5.6 (v7.0 is not supported yet – as October 2016)
    3. MySQL 5 (or later)
    4. A minimum server with a RAM of 2GB (4GB minimum, for production server)

    Installation Steps for Desktop Edition

    If you want to install osTicket locally using Ubuntu, then you need a Desktop version of Ubuntu 16.04. It’s up to you whether you want to use the 32 or 64-bit version. But in my case, I’m gonna be using the 64-bit version.

    Why the 16.04 LTS version? Because it’s the latest, and it has latest fixes and features that I won’t be discussing here.

    Before starting off with this guide, make sure you already have downloaded the latest version of OST. Also, you must already have launched a Terminal.

    To launch a terminal in Ubuntu Desktop, press and holdctrl + alt then t

    Then follow these steps below to start off.

    1. Step 1: Install the LAMP Stack on Ubuntu 16.04

      Ubuntu 16.04, is shipped with PHP version 7.0. The version which is NOT yet support as of OST v1.9.14. But we can get around that, and instead, install PHP v5.6.0. Take note of this again, when you run apt-get install lamp-server^ on Ubuntu 16.04 – what you’ll get is php v7.0.

      We need to remove v7.0 and use v5.6 instead. In other cases, this won’t be necessary since you can have both version (php v5.6 & v7.0) on the same server, but that’s more complicated for Linux noob like ourselves. So to install OST on Ubuntu 16.04, we need to completely purge php v7.0 (specific to our case) and let’s bring php v5.6 onboard.

      To install LAMP using PHP v5.6.0, type the following on the command line.

      sudo apt-get install -y lamp-server^

      The above command shall install Apache Web Server, MySQL Database Server, php v7.0 – along with phpMyAdmin for frontend database administration. I’ve mentioned above that php v7.0 is not compatible with OST v1.9.14. So we need to purge php after installing the LAMP stack. Details of this is below.

    2. Step 2: Purge PHP version 7.0 and install v5.6.0

      Invoke the following command in sequence, hitting ENTER key for each command:

      • Command 1

        sudo apt-get purge `dpkg -l | grep php| awk '{print $2}' |tr "\n" " "`
        
      • Command 2

        sudo add-apt-repository ppa:ondrej/php
        
      • Command 3

        sudo apt-get update
        
      • Command 4

        sudo apt-get install php5.6 php5.6-cli php5.6-mysql php-gettext php5.6-mbstring php-xdebug libapache2-mod-php5.6 php5.6-gd php5.6-imap php5.6-xml -y
        

      Check if you successfully installed version 5.6.x by using command – php -v

      Sample output:


      PHP 5.6.27-1+deb.sury.org~xenial+1 (cli)
      Copyright (c) 1997-2016 The PHP Group
      Zend Engine v2.6.0, Copyright (c) 1998-2016 Zend Technologies
        with Zend OPcache v7.0.6-dev, Copyright (c) 1999-2016, by Zend Technologies
        with Xdebug v2.4.1, Copyright (c) 2002-2016, by Derick Rethans
      

      If you see 5.6.x – then you did it! Your PHP version is now downgraded to v5.6.

    3. Step 3: Install phpMyadmin for Database Server administration.

      Command:

      sudo apt-get install phpmyadmin -y
      

      When asked to “choose the web server that should be automatically configured to run phpmyadmin” – choose apache2 by hitting spacebar key, then hit tab key to select OK button, and finally hit ENTER key. Install process should continue.

      Reference Image: [caption id="attachment_2295" align="aligncenter" width="702"]Screenshot - Installing phpMyAdmin Screenshot – Installing phpMyAdmin[/caption]

      When prompted again to “Configure database for phpmyadmin with dbconfig-common” – choose Yes.

      Reference Image: [caption id="attachment_2296" align="aligncenter" width="710"]Screenshot - Configure phpMyAadmin Screenshot – Configure phpMyAdmin[/caption]

      Next, you will be prompted to enter twice, your application password for phpmyadmin. This is different login from the one configured above, under the lamp-server installation. That is the password for the MySQL Database. This login shall be used when login in to phpmyadmin web gui.

      Reference Image: [caption id="attachment_2297" align="aligncenter" width="703"]Screenshot - Configure phpMyAadmin - Enter Application Password Screenshot – Configure phpMyAadmin – Enter Application Password[/caption]

      That would be the last prompt, and installation of phpmyadmin should be completed after this point.

      You can now check http://localhost/phpmyadmin and log in as root user, and enter the password you configured in this step.

    4. Step 4: Create a database for osTicket

      After logging in, create a user with the same name as the database. To easily do this, click on User accounts between Status and Export tab.

      Then below the page, click on Add user account, and you should be taken to a new screen.

      Now enter values for; user name, hostname name and password.

      For the user name, lets use osticket just for the sake of demo. And for hostname, enter localhost. Then enter your desired password twice in the provided fields.

      Scroll a bit below the page and tick or check mark:

      • Create database with same name and grant all privileges.
      • Grant all privileges on wildcard name (username\_%).
      • Global privileges

      Then finally, click Go button on the bottom-right part of the page.

      Now, we’re ready to setup OST.

    5. Step 5: Extract OST ZIP File and copy the files to web root.

      Navigate to where you’ve downloaded the file, then extract the .zip file right-clicking on the file and click extract here.

      Open the extracted file and navigate to upload folder, then copy all the files to /var/www/html. To do this, while still on the upload folder, right-click on white space and click New terminal.

      Then type the following command:

      sudo cp -r * /var/www/html
      
    6. Step 6: Apply necessary file and folder permission.

      While still on terminal, type or copy/paste this command, one line at a time:

      sudo chown -R your-ubuntu-username:www-data /var/www/html
      
      cp /var/www/html/include/ost-sampleconfig.php /var/www/html/include/ost-config.php
      
      chmod 666 /var/www/html/include/ost-config.php
      
      mv /var/www/html/index.html /var/www/html/index.html.orig
      
      chmod -R g+s /var/www/html
      
      find /var/www/html -type d -exec chmod 0755 {} \;
      
      find /var/www/html -type f -exec chmod 0644 {} \;
      

      If you fail to complete this step, you end up running through *Error 500** when accessing the frontend.

    7. Step 7: Start the installation wizard.

      To install osTicket locally, fire up your browsser and navigate to http://localhost/setup – install page should open, and you should see that all recommended php extension are enabled.

      Reference Image: [caption id="attachment_2298" align="aligncenter" width="658"]Screenshot - osTicket required and recommended requirements and extensions are met. Screenshot – Required and recommended requirements and extensions are met.[/caption]

      Click on CONTINUE button to start the install wizard.

    8. Step 8: Fill out all the necessary fields on the page, most importantly the database details;

      • MySQL Hostname: localhost
      • MySQL Database: osticket -> as used in this guide, enter your if you have configured differently
      • MySQL Username: osticket
      • MySQL Password: your data base password

      Take note, that the default email address should be the address to where tickets are sent to. In a real production setup, you might want to set it as [email protected] or maybe [email protected].

      When all important field are correctly filled out, click the install now button at the bottom of the page.

      If installation is successful, you’ll be taken to the Congratulations! page.

      Reference Image: [caption id="attachment_2294" align="aligncenter" width="1340"]Screenshot - Frontend Page View Screenshot – Frontend Page View[/caption]

    9. Step 9: Post-install task.

      Change file permission for /var/www/html/ost-config.php , type this on your terminal:

      chmod 644 /var/www/html/ost-config.php
      

      Note: While NOT mandatory for a demo/test setup, you should delete the setup directory for security purpose.

      Command:

      rm -rf /var/www/html/setup
      
    10. Step 10: And we’re done!

      By now, you should already put up an instance of OST on Ubuntu. You can also use this guide under Server Edition of Ubuntu, but you need extra tool called SSH.

      You should now be able to login and explore the admin and frontend.

      Note: Installing on a remote web server like; VPS or Dedicated server, is not too different with this procedure. You only need to use a Server version of Ubuntu 16.04, plus SSH client to remotely connect to your server. Then follow through the steps mentioned in this part.

      In addition, you will need to extract the installer file using the commandline, and move the files around your server. You need a little Linux skill with this one.

      How about you read this post about VPS setup to have an idea.

    Jump Links

    XAMPP: Alternative Way of Installing osTicket on Windows

    Here’s another step-by-step guide on how you would setup an instance of osTicket on Windows 7, 8 and 10. You will need another WAMP stack called XAMPP, a software project maintained by Apache Friends. It’s an open source software that makes developer’s life easier, by providing them an easy to install Apache distribution containing MariaDB/MySQL, PHP, and Perl. Not only that, it also help newbies like us, to setup a web server in Windows, the quickest and easiest way. How so? Because setting up a web server is just two step away; download XAMPP and install XAMPP and voila! You have a WAMP server!

    On the other hand, there is also a Windows-based WAMP stack I mentioned, and that is USBWebserver. It’s a portable web server that you can take and run anywhere you want. Read how I setup OST with this stack by clicking here.

    To install osTicket using XAMPP, first you need to download the latest version of XAMPP and make sure you choose the stack that supports PHP v5.6.x and below. Why? Because OST doesn’t support PHP v7.0 yet, as of October 25, 2016 (v1.9.14).

    Reference Image: [caption id="attachment_2303" align="aligncenter" width="639"]Screenshot - XAMPP Download Page Screenshot – XAMPP Download Page[/caption]

    Okay, enough with the talk, let’s start off with this tutorial.

    NOTE: A quick video guide is available from this YouTube Link

    Procedure

    1. Step 1: After downloading XAMPP, locate the file and install it.

      In my case the file name is; xampp-win32-5.6.24-1-VC11-installer.exe. This step is very straight forward.

    2. Step 2: Extract OST installer files and copy to htdocs folder.

      Extract the zip file, and go to upload folder. And then duplicate the file named ost-sampleconfig.php and rename the copy as ost-config.php.

      Then create a new folder inside htdocs folder, and name it whatever you would want. In my case, I named it osticket. The htdocs folder is usually inside the xampp folder in c: drive. You can also access this folder through XAMPP’s Control Panel by clicking on the Explorer menu.

      Reference Image: [caption id="attachment_2304" align="aligncenter" width="628"]Screenshot - XAMPP Control Panel on Windows Screenshot – XAMPP Control Panel on Windows[/caption]

      After that, copy all the files and folder inside the upload folder and then paste inside osticket folder.

    3. Step 3: Launch XAMPP Control Panel & Start Apache and MySQL.

      You should’ve launched the control panel after you installed XAMPP. In case you have closed down the control panel, launch it again and click on each Start button that corresponds to Apache and MySQL.

    4. Step 4: Create a Database and Database User.

      Launch phpMyAdmin and create a user with the same name as the database name. You can easily do this from the phpMyAdmin Web GUI.

      Using your browser, navigate to localhost/phpmyadmin, no login required.

      Then navigate to User Accounts menu then Add user accounts. On this page you need to fill out; User name, Host name, Password, the most important of all – Create database with same name ang grant all privileges, check Grant all privileges, Global privileges – checked all, and finally click GO button on the bottom-right corner of the page.

    5. Step 5: Open a browser and start the osTicket setup wizard.

      Fire up your favorite browser and navigate to localhost/osticket – or localhost/your-folder-name. The install wizard should load up, showing pre-requisties and recommended extensions. All should have a checked mark. In case PHP IMAP extension is marked with red X, then you should first enable the extension and then go back to this page.

      To enable PHP IMAP extension in XAMPP – you can simply click the config button for Apache, using the control panel. That should open your text editor like notepad.exe. Then hit ctrl + f to search for the string imap. You should see the line ;extension=php_imap.dll. Comment out this line by removing ; in front of extension, and save the file.

      Reference Image: Screenshot - How to install osTicket on Windows Using XAMPP

      Go back to XAMPP control panel, and stop and start Apache to let the config take effect. After that, go back to your browser and reload localhost/osticket – expected result; PHP IMAP extension should now have a green check mark.

      Next, go back to the Basic Installation Page and continue filling out the important fields; Database and Admin Credentials.

      After that, you are ready to install the software.

      Hit Install Now button.

    6. Step 6: Login and configure.

      After seeing the Congratulations! page, you can now navigate to the frontend and backend of OST and configure it further. You can now make tests and experiment with the settings without limits.

    7. Step 7: Installed!

      Now that osTicket was installed using XAMPP, you can play around and explore the settings. Take note again that this environment is for Demo and Testing purpose only.

    It’s a Wrap!

    There you have it! By now, you should already have an instance of osTicket that you can test all the way without limits. You can explore and test all the features locally. Test it as an Agent or Admin without limits. After all, it’s a free help desk software and open source.

    Once you decide to use and wanted to set it up on a production environment, say like VPS or dedicated server, you just need to sign-up for the hosted account provided by Enhancesoft Team.

    Or if you want to setup your own instance and have the courage of setting it up on a live environment, then consider Amazon or Digital Ocean as your Cloud Server Host. Their service is newbie friendly and their support is top notch.

    Installing osTicket locally is not that hard, with this step-by-step howto guide, you can quickly set up an instance on any of your local servers or machine.

  • Setup your own VPN server using OpenVPN-AS + Ubuntu 14.04 Server

    Setup your own VPN server using OpenVPN-AS + Ubuntu 14.04 Server

    Wanting to learn how you would create your own remote VPN access server? Well, jumped in and I’ll teach you how you would exactly do this using free and open-source software called OpenVPN AS or OpenVPN Access Server.

    In this guide you’ll learn how to setup and configure a remote access server for you

    VPN needs. If you’re up on setting; a secure Internet connect, bypass ISP traffic shaping or capping, use a country-based IP to get access to country specific services like Hulu, Netflix or Vevo, then this guide definitely for you.

    First off, I want to give you a brief overview about the difference between the OpenVPN Community Edition and OpenVPN Access Server. You probably thought that setting up your own VPN remote access server is that difficult and tedious, well I’ll tell you that it’s not. There are two editions of OpenVPN, as I’ve mentioned it already. The one to be used in this guide is the OpenVPN Access Server edition.

    This edition is easy to install and very easy to configure too. It actually has a Web-based GUI where you can easily configure and administer, creating new user and new VPN settings is just a point-and-click away. The Community Edition is not restricted to number of users, while the Access Server Edition is limited to 2 user accounts only (license restricted). If you need more VPN users accounts to your remote access server, you should purchase more license for them, and the minimum number of license that can be purchase is 10. By the way, you can set a user account to have more than one concurrent connection from its end, that means, a single user account could have more than one connection. The Access Server Edition comes in software package, that means you can just download and install it on various supported platforms (Debian, Fedora, Centos).

    Unlike the Community Edition, where you need to manually install it using the command-line, and you need to generate the SSL/RSA files manually too. With OpenVPN Access Server Edition, everything is simplified and polished, you can easily install your own VPN access server using only two commands (wget and dpkg – more on this below). If in case you only landed to this page from somewhere else while searching for VPN or OpenVPN, and you’re not actually wanting to setup your own VPN Access Server, instead you’re searching for VPN providers that you may subscribe to, then see the list below. With these providers, you don’t have to go through all the steps mentioned in this guide. Instead, you only need to download the configuration file from your client dashboard, once you subscribe and paid. There is also a VPN provider that lets you signup for a VPN trial account.

    Known VPN Service Providers

    1. Hide My 4ss
    2. CyberGhost
    3. PureVPN
    4. SaferVPN
    5. SwitchVPN

    Road-warrior Setup With US-based IP

    There are various implementation of an OpenVPN access server; one could be a road-warrior setup, site-to-site connection, client-to-server

    VPN setup in pfSEnse, or just a simple remote VPN access to access certain IP-based or Country-restricted service like HULU or Netflix. So for the first part, I will cover the procedures on how to setup a single client to remote access VPN server. This VPN implementation is applicable to a road-warrior setup and at the same time, access HULU or Netflix using VPN. If you’re always on the go and Internet connection is part of your job, this setup would be very beneficial to you to secure your connection. Also, if you’re looking to subscribe for a HULU or Netflix account but not yet offered in your country, then this would be the easier and cheaper way to access the service from your country. For this setup, you’ll need a VPS (Virtual Private Server) to host your OpenVPN Access Server instance. Don’t be discouraged when I mention VPS, it’s not that hard to setup and not that expensive as you may thought of. We’ll be using one from Digital Ocean’s Ubuntu droplet, this is gonna be easy and I’ll walk you through the step-by-step guide on how to set things up. After you completed this setup, you won’t be needing the service of known VPN providers anymore, because you already have it and it’s lot cheaper than Air VPN or Ghost VPN. Using Digital Ocean’s $5 droplet, you can setup a 1TB monthly bandwidth allowance and a 20GB worth of SSD storage, not that bad for a personal DIY VPN access server. Okay, enough with the talk, let’s move on.

    Requirements For This Setup

    • 1 Digital Ocean droplet (VPS worth $5)
    • OpenVPN Access Server Edition, Package for Ubuntu 14.04
    • SSH Client (Putty for windows or plain terminal for Linux)
    • Any computer or mobile device to test your setup

    Procedures

    • Step 1: Create your SSH-key pairs to use with your Digital Ocean droplet (VPS). This is very essential before creating your first droplet or server. It’s a good way to secure your connection between your local machine and remote server right from the start. So before you create your server, generate the SSH key pair. This would be a password-less connection using the root account from your Ubuntu server.

      If you’re on Windows, you need to download putty.exe and puttygen.exe. Use puttygen.exe to generate the SSH keys. You can download it from this link After downloading the file, fire it up and you should see something like this:

      Reference Image: [jig ids="1810"]

      Tick SSH-2 RSA from the Parameters field-set and enter 2048 or 4096 in the Number of bits in a generated key field-set. Then click Generate button to start creating the SSH keys. Move your mouse randomly within the window to fill up the progress bar. When it’s done, you should see another field-sets containing; the generated public key, Key finger print, Key comment, Key pass-phrase, Save public key and Save private key button. Reference Image: [jig ids="1811"] Save the generated SSH public key by copying the whole block of text found inside the Key text area and paste it to a new text file (use notepad) and save it with a file extension of .pub. In my case, I’ve created a folder named SSH-Keys inside my Documents folder and then I saved the file as digital-ocean-ssh.pub. Reference Image: [jig ids="1812"] While still on the PuttyGen window, click Save private key button to save the SSH private key file to a filename with .ppk file extension. In my case, I’ve put it inside SSH-Keys folder with a filename digital-ocean-ssh.ppk. You may now close the puttgen.exe window to continue with the next step. Reference Text for .pub ssh key file content:

    ssh-rsa AAAAB3NzaC1yc2EAAAABJQAAAQEArEJ7LaeS68oGbvdts5aGIZBQjZ5zmdGaorw
    /AhMWD8NYbasqJh0wuJpHQRxWc0g93FNSOW7LGtQme7QuiEM9HyJQWyLtiwi9udqaxgSM2x
    Xilnxe49kFxtypfCgsKAyzC0phXCYb7QUdgLKWEr33d6soNohzqVre2meXZcDmZuAechMJf
    73JSHi76FSdg4YPhwCriqvyL56/pI4h3SjKLfyIVGBPiJy25xbLE8E7frbFrDAeyvfUzEDP
    W3C40vXcLH1XONNI/Jv8E66DXFCm1sCxya9su9tnlshJ+ZXjvLWLkN38i0wc1kPqHGwUXua
    FQS0/hDv/aD6SVJfNLXXaGQ== rsa-key-20140828

    If you’re on Linux/Mac, simply fire-up a terminal and type: ssh-keygen -t rsa -b 2048 -f ~/.ssh/name-it-like-you-wish

    ssh-keygen is the main command, -b 2048 tells key strength if it’s 1024, 2048, and 4096 bits. -f ~/.ssh/name-of-the-file tell it to where the ssh-keys should be saved in your local folders.

    • Step 2: Sign-up for a Digital Ocean Account and create your first VPS (Virtual Private Server) or droplet (as what Digital Ocean refers to). After signing up, make your initial deposit of $5 to enable your account for droplet creation. But if you signup now through this link, your account will be credited worth $15 in total. So you get additional $10 credit on top of your $5 initial deposit, and would be able to run a 512Mb VPS for 3 months. Awesome right? Reference Image: Screenshot: Digital Ocean Promo Before creating your first VPS, add your public SSH keys by copying and pasting it to your control panel. To do this, go to your navigation menu (left side) click SSH Keys to go to the next page, then click the big blue button labeled Add SSH Key. Enter a name, let’s say for instance Windows Machine, and paste-in your public ssh key inside the Public SSH Key text area. Then click the big green button labeled CREATE SSH KEY. Now you’re ready to spin your first droplet. See next step below. Reference Images: [gallery ids="1816"]

    • Step 3: Create a droplet for your OpenVPN access server. For this guide, we’ll be using Ubuntu 14.04 LTS 32-bit Server Edition for our Host-OS, but you may use the 64-bit version. Click the big green button labeled Create then fill up Hostname field, for demo purposes, let’s name it openvpn. Select size and click the $5 package, which is a 512, 20GB, 1TB/month VPS package.

      Select region and choose San Francisco 1, New York 1, 2 or 3.

      Select image by clicking Ubuntu Logo then Ubuntu 14.04 x32 button.

      Reference Image: [jig ids="1820"] Now, under Add optional SSH Keys, add the SSH keys you have added previously from step 1 by clicking on it.

      Reference Image: [jig ids="1821"] Make sure Enable VirtIO is checked, and finally click CREATE DROPLET button. Your VPS will then be created for under 55 seconds. When it’s done, proceed to the next step.

    • Step 4: Login to your server remotely using SSH. Login using SSH by typing ssh root@ip-address-of-your-server. If you’re on Windows, launch putty.exe and do the following:

      • Fill up Host Name (or IP address)` field with your server’s IP address
      • From the left-pane, expand Connection menu and click on SSH to expand it more
      • Click Auth and click Browse button under Authentication parameters field-set.
      • Navigate to your .ppk SSH private key file and open it.
      • Then finally click Open button again to make the SSH connection Reference Images: [jig ids="1823,1824,1825,1826"] If you’re on Linux/Mac, simply open up a terminal ctrl + alt + t and type in the ssh command.

      Note: If it’s your first time to connect, you’ll be asked about PuTY Security Alert, just make sure that you’re connecting to the right IP address and click YES.

    • Step 5: Download and Install OpenVPN Access Server. Now that you’re logged in as root, let’s download and install the right OpenVPN-AS package for our version of Ubuntu, which is Ubuntu 14.04 LTS Server x32. Head over to the OpenVPN AS download page and right-click on Ubuntu 14 amd/x86 32-bit green button, then select Copy Link Address from the context-menu. Reference Image: [jig ids="1827"] Go back to your terminal and type in wget then space. Then paste in what you copied by right-clicking on the terminal window and click paste. Middle mouse click if you’re using PuTTY. This is what should be in your command-line:

      wget http://swupdate.openvpn.org/as/openvpn-as-2.0.10-Ubuntu14.i386.deb

      Reference Image: [jig ids="1828"]

      Press ENTER key to start the download. After this, install the .deb package by using the following command:

      dpkg -i http://swupdate.openvpn.org/as/openvpn-as-2.0.10-Ubuntu14.i386.deb

      That should install the package and will only take a few seconds to complete.After this process, you OpenVPN web-gui should be accessible from:

      Admin UI: https://your-server-ip-address:943/admin Client UI: https://your-server-ip-address:943

      When installed, an administrative user-account is created and that you should enter a new password for it. The administrative user-name is

      openvpn, this is the user-name that you should use when logging in to the OpenVPN Web-GUI. So let’s create a new password for it and type the following command then press ENTER key;

      passwd openvpn

      You’ll be asked to enter your new UNIX password.

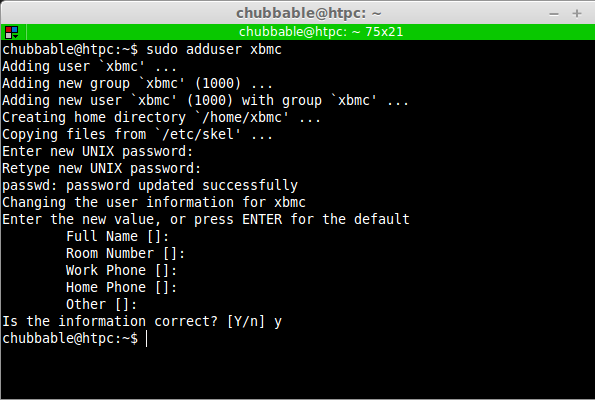
    • Step 6: Create a local user account for your OpenVPN client. Create a local user-account for your VPN user account. This account will be used for the web-ui login. To create a new user-account, type the following and press Enter key:

      adduser vpnclientone

      Then enter a password for it.

    • Step 7: Login to OpenVPN Web-UI and create a client account. Login as openvpn user with the password you previously created from step 5. The admin login URL is https://your-server-ip-address/admin. Make sure to use httpswhen accessing the web page. From the main navigation menu on the left side of the page, click on User Permission under User Management menu. Create a new VPN user by supplying the user-name you previously created from step 6. Enter the user-name in the New User text field. You may select Allow Auto Login by ticking the checkbox, to allow users to connect to the VPN server without providing their user-name and user-password. Click Save Settings to finish the process.

    • Step 8: Connecting from a client machine or device. S how to connect to the VPN server, the answer is like this; first login as a client to the OpenVPN web-ui and download the applicable user connection profile, then install it like any other software. If you want to connect from a Windows-based machine, login using your VPN client account, then choose and download OpenVPN Connect for Windows. Depending on the current version of the client software, you should download a file similar to this one; openvpn-connect-2.0.8.106.msi. Reference Image: [jig ids="1829"] After you install it, launch the OpenVPN Connect client software and check it from you system tray. Right-click on the icon and click Connect to your-server-ip-address, and you should be connected. Now make an IP address check by typing what is my ip in the google search bar, it should output your server’s IP address. Check your Internet speed and go over at speedtest.net. It should also detect your current IP address location. Then check if you can already access HULU, Netflix or Vevo, even you’re outside of US. If you’ve granted access, then your VPN access server is working!

    • Step 9: Configure your server to have a dynamic domain name. This step is optional. If you wanted to give your server a domain name, you could do that for free using a dynamic dns service like NO-IP. To set this up, sign-up for an account and login. Then navigate to Hosts/Redirects menu and then click on Add Host. Then fillup the fields, like so:

      • Hostname => your-desired-name.ddns.net
      • Host Type => DNS Host (A)
      • IP Address => your-server-ip-address Then click

      Add Host button to finish the setup. Your OpenVPN Access Server is now accessible using your configured host name. So when you’re on the road and you need a secured Internet connection, access your server using your host name and download the necessary configuration file.

    Basic Server Security

    Now that you got your server working, you need to setup some basic server security to harden your access server a bit. Though this is not a server for public use, it’s important to secure it just in case someone would try to gain access to your VPN server. So to implement basic security, follow the procedures below. For this part of the guide, we need to setup the firewall. Firewall Setup. To setup a basic firewall in Ubuntu, you need first to enable UFW (Uncomplicated Firewall). It’s an easy to use firewall front-end for IP tables, and it comes pre-shipped with Ubuntu. To enable UFW, type in sudo ufw enable or ufw enable if you’re logged in as root. You’ll be prompted with a message like this: Command may disrupt existing ssh connections. Proceed with operation (y|n)? y Just press y to continue. Do not logout yet while still on the server, you need to open the port for your SSH server. To open the port type in; ufw allow ssh

    Note: In Ubuntu 14.04, this will block all incoming port, except for port 80, 443, openvpn default port. You have to open port 22 for incoming SSH connection. After this, your firewall should be set. Harden SSH Server If you want to add more security to your server, hardening SSH is another good way to prevent automated attacks to your VPN server. To make this happen follow the steps below.

    • Create a new admin user-account:

      Login as root via SSH and type in:

      adduser your-admin-user-name

      Enter a strong password twice, then press enter key to continue. You may skip other details by pressing enter key. Once done, add the new user to the sudoer file. This should give the new user an administrative privileges to your server.

      To do this, type the following command:

      usermod -aG sudo your-admin-user-name

      Next, copy your authorized_keys file to .ssh folder, under your new user-account’s home holder.

      Do the following steps:

      • Create a new folder under /home/your-user-name/ and name it .ssh. In Linux, a folder or file prepended with a dot means it’s hidden. To create the folder:

      mkdir /home/your-user-name/.ssh/

      • Copy the current authorized_keys to your new .ssh folder. cp .ssh/authorized_keys /home/your-user-name/.ssh/

      • Change the folder owner and assign it to your new-user-account. chown -R your-user-name:your-user-name /home/your-user-name/.ssh/

      • Change folder and file permission. chmod 700 /home/your-user-name/.ssh/

      chmod 400 /home/your-user-name/.ssh/authorized_keys

      DO NOT log out or exit from your session yet. Do the next step below.

    • Disable Root Login: Disable root login. To do this, login as root user using SSH and edit the /etc/ssh/sshd_config file by typing:

      nano -c /etc/ssh/sshd_config

      Look for the line (line 28 or close) containing

      PermitRootLogin without-password, change it to PermitRootLogin no. Next, find the text #PasswordAuthentication yes (around line 52) and change it to PasswordAuthentication no Next, look for UsePAM yes (last line of the page) and change it to UsePAM no. Create a new line and enter UseDNS no, this is not really a big security benefit but it makes loging in pretty quick. Then create a new line of text under that with AllowUsers your-user-name

      Reference Text:

      UsePAM no
      UseDNS no
      AllowUsers your-admin-username

      Finally, save the file by pressing

      ctrl + o then enter key to confirm saving the file, then press ctrl + x to exit the editor. Make sure that you put the right user-name for AllowUsers or else you won’t be able to log in anymore. You need to rebuild your droplet if that happens. To implement your settings, type in service ssh restart. After restarting SSH you won’t be able to log in as root user anymore, so you need to login with your new user-name:

      ssh your-user-name@server-ip-address

      or

      ssh your-user-name@hostname

      If you got logged in, then you did! You have configured your SSH server for better security.

    That’s a Wrap

    There you have it, you now know how to setup your own VPN server, either for a road-warrior setup or to access HULU or Netflix outside of US. It’s not that difficult to setup, just read the guide carefully and don’t be in a haste when you try to follow this guide. Take your time and double check what you’re doing, on every step of the way. If there is something you want to ask about this guide, or something you wanna share, feel free to post your comment below.

  • Setup Your DVR or IP-Cam For Online Remote Access

    Setup Your DVR or IP-Cam For Online Remote Access

    Here is a simple guide that will help you setup your DVR (Security System) and Router for remote web access, using a DD-WRT router and a free DDNS service. This guide is intended for personal and home use. Corporate or industrial setups are far more complex to setup than this. I will not discuss about complex firewall and RADIUS setup here, since this guide is primarily intended for simple and basic home use setup. You could setup your own advance CCTV system once you understand and learn the basics of simple networking.

    If you follow this guide, I’d like to warn you first that this requires a DD-WRT flashed router. I don’t have any other routers at hand right now, that is why this is the thing that I’m gonna use with the guide. The idea would be the same even when you use another router, you may still follow this guide. I’ll discuss with you about Port Forwarding, this feature is almost available in all modern-day routers in the market. I will not dig into technical details and will not explain every terminology used in this guide, but I will walk you through to setup the necessary things so you could access your DVR or CCTV system remotely via the Internet.

    Follow this guide step by step and you will surely learn how to access DVR remotely even without a public static IP address.

    You need the basic stuffs enumerated below for this guide. Read on.

    Preparation

    Before following this guide make sure your Internet and CCTV/DVR are working as they should and that you already have a working home-network setup. When all is running fine, go ahead and start with this guide. Check the stuffs below and make sure it comes handy.

    Things You Need:

    • DD-WRT Flashed Router, or any other Router w/ DDNS support
    • Router already configured to use PPoE
    • ISP issued modem already in bridge-mode
    • Network Switch/Hub, if you don’t have extra port from your router
    • DDNS Service Account from No-IP.com

    Steps To Take:

    1. Assign static IP and port number for your DVR or IP-Cam
    2. Setup port-forwarding
    3. Signup for Dynamic DNS service & setup DDNS in your DD-WRT Router
    4. Testing

    Terms You Need To Get Familiar With (in case you’re not)

    • Private IP – means the IP address assigned and usable within your internal network or LAN.
    • Public IP – means the IP address assigned to you by your ISP, most are dynamic IPs and changes all the time.
    • Static IP – means an IP Address assigned manually and not by a DHCP server.
    • Dynamic IP – means an IP address assigned dynamically by a DHCP server, like the ones issued by your ISP or by your router within your LAN.
    • Port Forwarding – means the technique to re-route or redirect a packet bound to a specific UDP/TCP port and machine, to another specified port or machine.
    • Dynamic DNS (DDNS) – is a method that keeps a Name Server constantly updated with a host’s IP address.

    Note: You don’t need a STATIC IP subscription from your ISP, just to get your CCTV remote viewing setup working or to setup your DVR for remote access. The reason why I’m telling you this is that, I came across a forum site where some of it’s veteran member suggests that you need to get a Static IP from your ISP to get the setup working. Not really a mandatory thing to get, with the power of Port Forwarding technique and DDNS, static Public IP will not be a requirement. What is required, is a static IP address assigned to your DVR or IP-Cam.

    Let’s Get Started, Whenever You’re Ready

    Before proceeding with the following steps below, make sure that you’ve already assigned a subnet for your private or internal home network. But in case not, do the first step below.

    1. Assign static IP and port number for your DVR or IP-Cam.. There are ways to accomplish this; assign a static lease from your router or assign a static IP address from your DVR/IP-Cam Admin Panel. But I suggest that you assign the IP address using the admin panel. What you’ll be assigning is a Class C addressing, which are used only for internal network (ie: 192.xxx.xxx.xxx/255.255.255.0). Most routers are pre-configured to use 192.xxx.xxx.xxx as the router’s IP address and 255.255.255.0 as it’s subnet mask. I suggest that you follow this scheme and assign one to your DVR or IPCam.

      Advancing further with this guide, assign a static IP address to your DVR or IP-Cam using its Admin Panel. You may press the button Menu either from the DVR itself or remote control. Generally you should see the settings from Network Setup or Networking screen or other similar words. If you don’t see it from the main screen, explore the sub-menus.

      When you found the setting, assign an IP using 192.xxx.xxx.xxx (ie 192.168.100.101) and also assign a port. There are two ports to fill-up, port for administration and port for viewing. So go ahead and fill those up, you may enter a port number like 9001 and 9002. Most DVRs comes pre-configured with IPs and Ports, if your device comes with pre-configured network settings, I suggest that you just adapt and use it with this guide. You may adjust your router settings to match your DVR or IP-Cam’s network setting. The purpose of the port assignment is to specify a port dedicated for administration and another port for viewing only. To illustrate this further, take a look below.

      Note: Only choose port range above 1024. Higher port range would be nice, but keep it below 65535.

      When you access the Admin Panel via network, you typically type this in your browser’s address bar;

      http://192.168.100.101:9001

      To just view or monitor a camera via Web, you would type like this in your browser’s address bar;

      http://192.168.100.101:9002

      Take a look at the images below. That is how I’ve setup my IP address settings in my DD-WRT router.

      Some DVRs or IP-Cams are configured differently, so it depends how its web server are configured. So you might need to consult your manual on how to reach your Admin Panel via web browser. With some model you have to type in like this (yours may be different);

      http://192.168.100.101:9001/admin < — for web admin http://192.168.100.101:9002/view <– for web view

      Alright, if your done with the IP address assignment, you can now test your settings and open up your DVR or IP-Cam’s admin panel using any browser you like (some old models have incompatibility issues with Internet Explorer 7 and below). Use the IP address and port combo that you had set in the previous steps mentioned above. You need a computer hooked to the same network and configured to use the same IP/subnet as your DVR configured with. So if your DVR is configured to use 192.168.100.101 your computer should be configured to use 192.168.100.xxx (ex. 192.168.100.100)

      This is how it should look like in your DVR network setting:

      • Your DVR network setting
      Address: 192.168.100.101
      Netmask: 255.255.255.0
      Gateway: 192.168.100.1

      This is how it should look like in your computer network setting:

      • Your computer network setting
      Address: 192.168.100.100
      Netmask: 255.255.255.0
      Gateway: 192.168.100.1

      You don’t have to follow exactly the way I put the IP, you can make your IP addressing like 192.168.xxx.xxx with a subnet mask of 255.255.255.0. The Gateway IP should be the IP of your router.

      If you successfully accessed your DVR using your network config, then you may now proceed to the next step.

    2. Setup the router and configure Port Forwarding. In this step I will discuss how to port forward in DD-WRT flashed routers, so I suggest that you have this router handy before proceeding with this step. But if you don’t have it, you may still follow, since port forwarding is generally the same with most routers. You’ll always find these fields; port range (port from and port to), application name, IP address and protocol The only difference are the location of menus and arrangement and placement of input fields.

      I’m gonna be using my Linksys WRT54G2 v1 model, flashed with DD-WRT v24-sp2 (10/10/09) micro. If you have a different router it’s alright, you can still follow this guide, since most routers has similar port forwarding menus.

      Alright let’s start. Login to your DD-WRT router using your login credentials. Upon logging in navigate to NAT / QoS >> Port Forward.

      Then do the following steps:

      1. Fill up te Application field and enter cctv-admin, or name it whatever you like. In this step, we’ll be forwarding ports to your DVR’s Admin Page.
      2. Fill up Port from and enter 9001. This is the port you had setup in your DVR or IP-Cam from the previous step.
      3. Fill up Protocol, you may select Both
      4. Fill up IP Address and enter 192.168.100.101. This is the IP Address of your DVR or IP-Cam.
      5. Fill up Port to and enter 9001.
      6. Check Enable.
      7. Repeat step 1, but this time you should enter cctv-view or name it whatever you like.
      8. Fill up Port from and enter 9002. This is the port you had setup in your DVR or IP-Cam.
      9. Repeat step 3 and step 4, you may substitute the IP address with your IP.
      10. Fill up Port from and enter 9002.
      11. Check Enable.
      12. Finally, click Apply Settings.
      13. We’re done with this step, next we test our settings.

      Test Your Port Forwarding Settings. To test if you successfully configured a port forward setup, you need to access the IP address with a port number combo and from another separate network, that is not within your network. It should be from another outside network. So you’ll need another separate Internet connection to test your config.

      To test your config, you should know what your current Public IP Address is. You can find this out by just typing what is my ip in google.com’s search field. Doing this will show you the result page similar to the image below.

      Now that you know what your Public IP is, go ahead and fire up your browser and enter the following in your address bar.

      http://128.199.252.11:9001

      You should be redirected to your DVR’s admin panel’s web page. If you reached the page, then you have successfully configured a port forward setup in your DD-WRT router. By now, you already have a remote web access to your DVR or IPCam using your known public IP address. But that’s not it.

      If your rebooted your router or your ISP changed your IP address, you can’t access your CCTV system using your previously known IP address any more. You need to know your new public IP address so that you could type it in and access your DVR or IPCam. But how would you know about the change? Your ISP or your CCTV system won’t even notify or update you about the change, so you need a method that will do this for you. This is where DDNS comes into play. DDNS service will not only notify you about the change, it will also notify and update a name server that maps your Public IP Address to an easy-to-remember hostname. So with this method, 128.199.252.11 shall be mapped as name.domain.tld or your-own-domain.tld.

      Read on, to follow the DDNS guide.

    3. Setting up a Dynamic DNS in DD-WRT. You need to configure this service in your DD-WRT router, specially when you’re on a a Dynamic IP Plan. You may also use this service with your static IP plan, but you may rather use a registered domain name if you have a static IP.

      Subscribing to a static public IP plan is expensive in most third world countries, in my country (Philippines) static IP address subscription is almost 5 times the monthly subscription fee of a regular Internet Plan. It’s impractical to subscribe for such service only for the purpose of setting up a DVR for remote online access. But I’ve seen and met several people, personally and from forum sites, they subscribed for a static IP just for the sole purpose of "CCTV Remote View" or "DVR Remote Access" setup. I like to mention this again, what you need is a static IP address assigned to your DVR or IPCam, and not a Public Static IP (your internet ip address assigned by your ISP).

      That being said, I like to mention that static public IP address that comes with a Web hosting account is not that expensive compared to the ones issued by Home Internet ISPs.

      Let’s continue with this step, first of, login to your DD-WRT router and navigate to SETUP >> DDNS. From the DDNS Service drop-down menu, you’ll see a bunch of Dynamic DNS services like, DynDNS.org, No-IP.com and easyDNS.com. For this guide we’ll be using No-IP.com DDNS service for our Remote DVR Access setup.

      DDNS is also available in most known stand-alone DVRs. Only thing is, they are bundled with a Paid-Subscription service like DynDNS.org or the manufacturer’s own DDNS service.

      You need a No-IP account to follow-on with this guide, so if you don’t have an account yet, head over now to https://www.noip.com/sign-up and create an account. No-IP is a paid service, BUT you may signup for a FREE Account. The FREE account offers 3 hostnames but offers no-phone support and it’s Ads enabled. Plus you have to login every month to re-activate your account so you won’t lose your host name. If you fail to re-activate your account, your hostname will be deactivated. Not that bad for a Free Account.

      To setup a proper Dynamic DNS in DD-WRT using the No-IP account, we need to input your No-IP account username and password in the designated input fields. So if you already have your No-IP account, input it now in the proper fields (username, password and hostname). Hostname is the name you configured during your No-IP account signup or the hostname you’ve created in Manage Host page of the No-IP account dashboard. After doing this click Apply Settings. When everything went smoothly, you’ll see a log status on the same page, under DDNS Status field.

      Note: From the screenshot above, Force Update Interval is set to 1. This setting will check your current public IP address and will update and notify No-IP.com about your IP address change, with an interval of 1 day.

      So everything went smoothly right? The question now is, how to access the DVR or IPCam remotely? Read further below to find out.

    1. Time To Test Your Setup For Remote Access. To test your settings, you need another network for this. You have to access your DVR or IPCam remotely using another computer from another network. There are various ways to do this; you may use a pre-paid usb internet, use your data plan with your android or ios phone, ask a friend to access your DVR or IPCam remotely from his network or use web services like http://www.portcheckers.com/ to test your port forwarding configs.

    Upon logging in from another network, start a browser and access your DVR remotely by typing your No-IP host-name plus port number combo. In my case, I don’t have a DVR but IPCam and I’ve forwarded port 9001 to my IPCam’s IP address, that is 192.168.100.101 and my No-IP host-name is chubbable-dvr.ddns.net. So this is how I would type in my browser’s address bar;

    http://chubbable-dvr.ddns.net:9001

    It should take me directly to my IPCam’s view page. In your case if it doesn’t, read back and make sure you have followed the guide correctly.

    I’ve mentioned before in the previous steps (Step 1) that you need to assign a different port number for the DVR’s admin page and the view page. Because each port number will be used for specific page. In my example I’ve used port number 9001 for admin page while port number 9002 for the view page.

    So this is how you would type in your address bar:

    • To access the DVR or IPCam’s admin page remotely, type in http://yourhostname.domain.tld:port. In my case…

      http://chubbable-ipcam2.ddns.net:9001

    • To access the DVR or IPCam’s view page remotely, type in http://yourhostname.domain.tld:port. In my case…

      http://chubbable-ipcam2.ddns.net:9002

      Just substitute http://yourhostname.domain.tld:port with whatever you came up with in your No-IP Host Name Settings.

      So there we have it, simple guide to get your setup working.

    It’s a Wrap

    I hope you successfully configured your own DVR remote access setup with this guide. It’s not that difficult right? It’s just a matter of simple port forwarding plus free Dynamic DNS service. You don’t need an expensive Static Public IP with your Home Internet Plan.

    I hope you’ve learned now how to access your DVR or IP-Cam remotely with this easy and step-by-step guide.

    In my next set of articles, I will write a guide on how to port forward with various router brands and how to setup bridge-mode with various ADSL Modems.

    If you have questions, clarifications, suggestions or additional info with this guide, feel free to put your comments below.

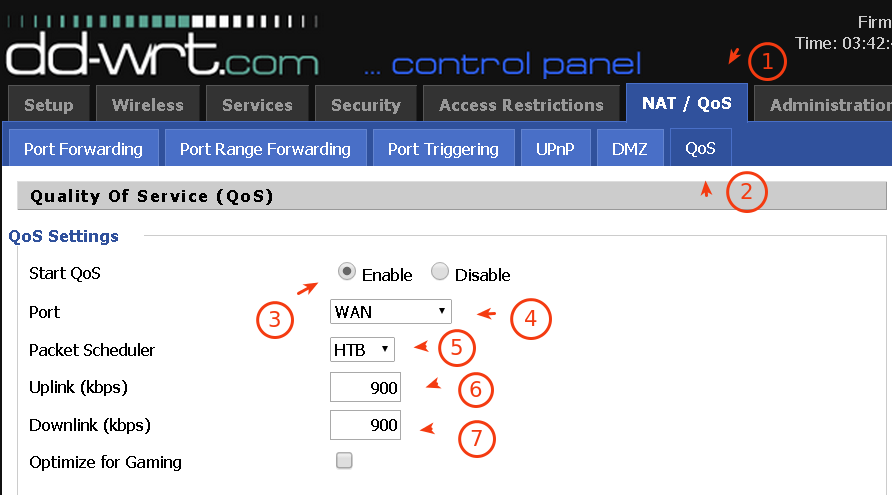
  • Newbie Guide on How To Configure Your DD-WRT For Bandwidth Prioritization or Speed Limit

    Newbie Guide on How To Configure Your DD-WRT For Bandwidth Prioritization or Speed Limit

    Here is a simplified guide on configuring your DD-WRT flashed WiFi Routers to limit or prioritize bandwidth for specific IP address, MAC Address, Application or Interface. If you’re the boss of your home network and you share your Internet with family members and guests, then you should be doing this on your Router. So jump on in and read the full tutorial.

    In order for you to follow the guide properly, you need a properly configured and working local home network. You also need to consider your Internet Speed plan for this and make sure that you have a full administration access to your ISP issued modem or network router. You also need to set your modem in bridged-mode, if you’re on a xDSL connection, and set your DD-WRT router to have a **WAN connection type** of **PPoE**. ## QoS, Bandwidth Prioritization, Traffic Shaping and Speed Limit You most probably searching for these terms when searching for guides to either limit the speed of your shared WiFi, throttle down the speed of downloads, or you need to prioritize on your gaming bandwidth. Bandwidth prioritization, traffic shaping, speed limiter, all falls under the Quality of Service. So if you want to configure a **Quality of Service** (QoS) rules on your DD-WRT network router, you could accomplish that by either bandwidth prioritization or traffic shaping. And that’s what we’re going to do with this guide, using your **DD-WRT flashed network/WiFi routers**. Before you start of with this guide, you should know first that you could actually set a QoS rule to target several aspects of your home network. And these are; – **Service or Application** Set priority rules based on service or application name. For example; VoIP, Skype, or a name of a Game like Dota 2. – **Netmask** Set priority rules to target a Netmask. Your netmask setting is your IP address range. So if you set your netmask to 24-bit, ie `192.168.1.0/24`, this would mean that your netmask covers IP addresses from `192.168.1.0` to `192.168.1.254`. So if your set QoS rules for Netmask with 24-bit, you are targeting a possible 254 hosts. – **MAC Address** This is a unique identifier issued to your network controller like Network Interface card or WiFi adapter. Setting a QoS rule to target this would mean a host or node specific rule. – **Ethernet Port** Setting a Quality of Service rule for this would mean all devices, hosts or nodes connected to a specific Ethernet port shall be affected by the QoS rule. ## Procedures Here are the steps to configure your network router’s Quality of Service. You could actually implement QoS by targeting several aspects of your home network. You could set a rule to target a specific IP address, Netmask, Service, MAC address or by Ethernet port. – **Step 1:** Login to your DD-WRT flashed router as admin. [caption id="attachment_2216" align="aligncenter" width="892"]Screenshot of DD-WRT Quality of Service Page Quality of Service Page[/caption] The default IP address to reach your Network Router is `192.168.1.1`. – **Step 2:** Navigate to the QoS settings page and enable the service. From the main menu click on **NAT/QoS** menu, then **QoS** just beside **DMZ** menu. On the page, click **Enable** checkbox for **Start QoS** field. For **Port**, should be **WAN**. Packet scheduler, pick **HBT**. From the dropdown menu, you’ll also see HFSC. But for the purpose of demonstration, I will HBT with this guide. Besides, in my experience HBT seems to perform better. For **Uplink** and **Downlink**, you should only enter 80% of your subscribed plan. Why? because not all the time, your ISP serves you their advertised bandwidth plans. So if you subscribed for a 1Mbps plan, you should only enter `800 Kbps` as your **Downlink** speed, as a contingency in case your ISP couldn’t serve their promised bandwidth speed for a certain period of time. – **Step 3:** Choose how you prioritize bandwidth. You could choose to set rules either for a specific service name, MAC address, IP Netmask, or Ethernet port. It’s up to you… you decide. Also, with DD-WRT… you could prioritize and control bandwidth based on five pre-defined priority class names called; Maximum, Premium, Express, Standard, and Bulk. To explain these further, read below. **Exempt** Any rules set to this priority class should not be affected. **Maximum** Any rules set to this priority class shall have maximum priority over others. A minimum of **60%** of total allocated throughput should be reserved for this priority class. **Premium** With this class, bandwidth priority is set to have a minimum of **25%** of the total allocated bandwidth. **Express** A minimum of **10%** of the total allocated bandwidth shall be set for this priority. **Standard** All services that are not set under any priority shall be automatically set under this class. A minimum of **5%** of total allocated bandwidth shall be give to this priority class. **Bulk** **1%** is allocated with this priority. If you’re into downloading, then you should set your apps to this priority class because with this class, if other users and application is using all available bandwidth while your downloader client is on… then this priority class will kick in and limit your download speed to a minimum of 1%. And when there is enough bandwidth, and no other users or applications is using the bandwidth, then it should use all the available bandwidth. > **Note 1:** Bandwidth is allocated based on “minimum” percentages of your allocated download speed from **QoS Settings** you set under **Step 2** above. > > **Note 2:** Minimum means, the least possible bandwidth allocation if most of your bandwidth is used up. To continue with this step, you need to choose which priority mode you would want to use. You could select either of the following: **Services Priority** – Set priority rules based on service or application name. There are pre-configured services already selectable from the **Service Name** drop down menu. If you want to add your own, you need to know what ports or port range your service/application use. For example, you want to **prioritize and control bandwidth for Dota 2**, it’s an online game right? So you need to know the port ranges used with this game and add it to a new service name. Here is a quick video demo for that. **Netmask Priority** – I’ve already mentioned about [this][1]. If you want the rule to target all local IP addresses in your LAN then you should use this. For example, you’re using subnet `192.168.1.0`, then you should enter `192.168.1.0/24`. Click **Add** button then set priority class. **MAC Priority** – Prioritize bandwidth based on your device MAC address, enter your target device MAC address here, then click add. Set priority class after. In case you’re not sure on how to get your device MAC address, then read this guide; “[How To Know Your Device MAC Address][2]” **Ethernet Port Priority** – If you want to set QoS rules for specific ports on your Router, then use this mode. Just select priority class for your chosen port, your can leve **Max Rate** part untouched. Don’t forget to click **Apply Settings** to save and commit your changes. So those are the easy steps in configuring your DD-WRT flashed routers. One thing more that you should know about these configurations. You should also know about **Precedence** ## Precedence or Order of Priority In real-world applications, there are times that you make several rules that may conflict with each other. Some priority rules gets trumped by the others and other rules takes over the others. That’s because of **Precedence** or the order of priority in case of contradicting rules. For instance, you have a computer that has an IP address of `192.168.10.101` and a MAC address of `A1:B1:C1:D1:E1:F1`. Then you set a rule like so; Netmask Priority = 192.168.10.101/24 | Priority = Standard MAC Priority = A1:B1:C1:D1:E1:F1 | Priority = Premium Obviously, this would have a contradicting rules. Because you set a **Netmask Priority** rule that targets IP address `192.168.10.1` onwards up to `192.168.10.254`. and it happens that your IP address is covered in this rule. Plus, you set another rule to target your device using it’s **MAC Address**. So in this scenario, you have set two priority rules that targets the same device or host. Now, the final rule that should take charge would be the **MAC Priority** rule. Here’s how the order of precedence works. No. 1 has the highest precedence and should take over other rules, in case of conflicting rules. – No. 1 – MAC Priority – No. 2 – Netmask Priority – No. 3 – Interface Priority – No. 4 – Services Priority – No. 5 – Ethernet Port Priority **How To check which QoS priority is taking over in my example case?** If you really want to check it, then you should use the command-line for this. If you’re on Windows, you could readily use `telnet` to invoke the command. Login as `root` and use your webgui admin password. You should always use `root` username plus your admin password to successfully login using **telnet**. So open up your command-prompt by going to Windows start menu > `run` > type in `cmd` and enter. A black screen should open, that’s the command-prompt. Now enter `telnet 192.168.1.1` or whatever IP address you configured with your DD-WRT Router. Then type in; `cat /proc/net/ip_conntrack` and press enter key. Output text should be printed on your screen. Now look for your device IP address, then along with it look for a `mark=` text. Take note of the value and compare the result with the following info. – **Mark=100** – means *Maximum* Priority is taking charge – **Mark=10** – means *Premium* Priority is taking charge – **Mark=20** – means *Express* Priority is taking charge – **Mark=30** – means *Standard* Priority is taking charge – **Mark=40** – means *Bulk Priority* is taking charge Moving back to my example above, **MAC Priority** should take charge over the **Netmask** priority. Take note of the *Mark Values* above, and [video_lightbox_youtube video_id=8h9rm5tCWQk&rel=0;autoplay=1 width=768 height=432 anchor=”watch my video proof”]. I should be getting a `mark=10` for **Premium** priority instead of **Standard** priority, which is set under **Netmask** priority. > Note: The MAC address used in the video is not my real MAC. It’s a temporary MAC address to be only used for the demo. But it should function as normal. ## Sample Setup & Scenario Here are some samples and real-world scenarios where you would want to setup QoS or control bandwidth on your DD-WRT-flashed Network Routers. 1. You want to prioritize your device to have the most priority within your local area network while the rest shall be given lower priority regardless of service or application being used. **Sample config:** Set your overall download and upload speed to 80% of your subscribed plan. Put your device to **MAC Priority** and enter your device MAC Address. Then choose **Premium** for *Priority*. Set the rest of the local devices to have a **Netmask Priority** by entering your *Netmask* under Netmask Priority block. Apply changes and that’s it. 2. You want to prioritize your online gaming speed, while letting others use any available bandwidth with video streaming and basic web browsing. Use **Service Priority**, add a configuration for your online game and fill up the service name and necessary port range. Add and save your changes. Set priority to **Express**, yes… that would be enough for online gaming. Configure other hosts/nodes to **Netmask** priority and put a Standard priority. If you have a Dedicated Downloader box, you may put it under **MAC Priority** and assign a *Bulk* priority to it. ## It’s a Wrap I hope you learned from this post and I wish that you followed and applied the guide with positive results. Feel free to experiment and create any priority combination, since there is no exact formula when it comes to this type of things. The most important thing is, you know the basics and you understand most of the labels and functions found in your DD-WRT QoS settings page. So take note of priority classes (premium, standard, etc.), priority modes (MAC address, Netmask, etc.) and mark values. Thank you for reading my guide on **DD-WRT Quality of Service Configuration**. Also check out my guide on *[TP-Link TL-WR720N QoS Configuration][3]*, and don’t forget to post any comments below. [1]: #netmask [2]: /how-to-obtain-static-ip-address-automatically-from-router#get-mac [3]: /limiting-wifi-speed-on-tl-wr720n-routers
  • Multi-in-one Home Server Using Linux – Setup Guide

    Multi-in-one Home Server Using Linux – Setup Guide

    Here is a guide on how to setup/configure your very own OpenVPN, Media Streamer, File Server, T0rrent Downloader and a Software Router, all in one Linux server box.

    Here is another Linux tutorial on how you would setup/configure your own multiple-in-one Linux home server. This guide will walk you through on how to configure a file server, OpenVPN server, media & streaming server, and a 24/7 t0rrent downloader, all under one Linux server box. This would be a power consumption saver for you, so if you’re interested in following this guide, then read further below.

    What Is ClearOS

    It is a Linux Distro based on CentOS that you could use as a Network Gateway and Network Server, which is designed for home, home office, small and medium enterprises.

    It is a headless server and installable on bare-metals, which has a Web UI.

    To find more about ClearOS, visit it’s Wiki page. All important links are listed in there.

    Jump Links

    Phase 1: ClearOS Installation

    For this multiple in one server setup guide, we’ll be using another opensource and free Linux-based distribution called ClearOS Community Edition. It is based on CentOS 6.

    The community edition is designed for home users, hobbyists, enthusiast and Linux developers. ClearOS has a Marketplace for Applications and Addons, just like Android Market or Google Play. Using the Marketplace, you could install and uninstall additional applications for your server in just a breeze.

    To get started with the installation and setup, read further below.

    Basic Installation and Setup Requirements

    • ClearOS Installation CD, download the ISO format and burn it to CD/DVD
    • A spare PC for the server or build another one for this purpose
    • 1 Hard Drive, this will serve as your boot drive and data drive
    • CD/DVR ROM drive or USB stick to hold the ClearOS installer
    • A working home LAN
    • 2 Ethernet Port, 1 for LAN and 1 for Internet access
    • 2 Ethernet Cables

    Installation Steps

    • Step 1: Insert the ClearOS install cd to your CD/DVD ROM drive and set your BIOS to boot from it. Then you should now be ready to boot your server.

    • Step 2: If you successfully booted up from the install CD, you should see a screen similar to the image shown below.

      Select Install or upgrade an existing system and press enter to start the installation wizard.

    • Step 3: A ClearOS splash screen should be shown now, click next and choose your language setting, click next again and choose your keyboard language settings and click next again.

      Note: Storage Device Warning will pop-up and will prompt you to discard any existing data. This will show if your hard drive is blank or un-partitioned. To automatically partition it, click Yes, discard any data.

    • Step 4: Choose your mode for your storage devices, you may select Basic Storage Device or Specialized Storage Devices. But for the purpose of this guide, select the Basic Storage Devices mode.

      Note: Specialized Storage Devices is used for more complex setup for your storage devices like SAN or iSCSI.

      For now, we should be good using the Basic mode, so choose "Basic Storage Device" and click next.

    • Step 5: Enter the hostname for the server, including the domain part. In my case, I entered myserver.chubbable.lan. Once you entered your desired hostname, click next to continue with the next step.

    • Step 6: Choose your timezone, you may click on the map or select from the drop-down menu. Click next after choosing one.

    • Step 7: Enter your desired admin/root password and click next.

    • Step 8: Choose installation type, since this is a new installation on a blank hard drive, choose Use All Space and click next two times and finally click format, then finally click Write changes to disk.

      Click next again when already in the bootloader install screen. Make sure "Install boot loader" is checked then click the "Next" button to start the installation process. It will take several minutes to complete the process.

    • Step 9: Reboot, after a successful install. Click the "Reboot" button to do a reboot. After you reboot, a login screen should prompt you. That’s it for the installation part, next part will be the configuration of ClearOS from the admin dashboard.

    ClearOS Configuration Guide

    Before you can use your ClearOS server within your network, you need first to configure it and install the necessary add-ons/apps to setup a multiple-in-one Linux home server.

    After you reboot your machine after installation, you should see a screen similar to the image shown below.

    Reference Image Here:

    clearos-login-screen
    • Step 1: Choose Network Mode. For this guide we’re going to use Gateway mode, so ClearOS will be hosting your internet connection as well as the firewall between your internal network and the Internet.

      Under "Settings" click on Edit button, then a new screen should open. Select Gateway Mode from the drop-down menu for "Network Mode". Then click on Update button.

    • Step 2: Configure the network settings. Click on the Configure network now button and you should be presented with a login screen. Login using the user-name root and the password you entered during the ClearOS server installation.

      Then you should see a screen with a Network Interface titled block. You should see your two ethernet ports here. In my case, eth0 is my on-board Ethernet Card and eth1 is my add-on ethernet card. For this guide, I’m going to use the add-on Ethernet card (10/100 Mbps) as my Internet connection, the port that will connect to the modem (which is in bridged-mode), while eth0 shall be my LAN port.

      To continue, click on Edit button that corresponds to the eth0 port. A new screen should appear, under Settings click the drop-down menu for Role, then select LAN.

      Next, click the drop-down menu for Connection Type then choose Static.

      Now fill-up the "IP Address" and "Netmask" matching your currently working network configuration, then click on Update button. The IP address that you set here will be the address of the Admin Web-UI, so take note of it.

      You should be back on the "Network Interfaces" screen, now edit "eth1" and setup your Internet connection type. Click the Add button to edit the role for this ethernet port. Under "Role" drop-down menu, select External, then under "Connection Type" drop-down menu, select PPoE if you’re on DSL connection while DHCP if you’re on a Cable Internet connection. Fill-up user-name and password if you set it to PPoE. Your DSL modem should be in bridged-mode to make "PPoE" connection work.

      Finally, click the Add button to finish the setup for this part.

      You can now continue editing the configuration from the ClearOS Admin Web-UI by accessing https://clearosip-you-set:81 using a browser from another machine.

      Note: You should use https and take note of the port number, it should be 81.

    • Step 3: Continue with the ClearOS configuration. Using a browser from another machine, access the ClearOS server’s IP address by typing https://clearos-ip:81 in the address bar.

      You should see a login screen. Now login as root then enter your user-password.

      You should now be at the Admin Dashboard.

    • Step 4: Continue and finish the configuration wizard. Using the Admin Web-UI, continue with the wizard and click on Next button found on the left-side of the screen. Click on it repeatedly until you reach the "Software Update" screen.

      You should see some available updates from this screen. If you’re not seeing anything, then you probably didn’t setup your network properly. Troubleshoot it first then go back to this point to continue with the setup.

      If you see available updates, install them by clicking Next button again. Then click Nextagain when you see "Installation complete" dialogue.

    • Step 5: System registration. After the above step, click "Next" again to go to the "System registration" screen of ClearOS configuration wizard.

      To complete the registration process of your system, you must have already a ClearOS account. If you don’t have it yet, then create a new one by clicking on the Create Account button. Then fill-up the required fields and click the Create Account button again. When done creating your account, go back to "System Registration" screen and input your registered account details.

      You need to enter details for "Account", "Password", "Type", "System Name", and "Environment".

      For the "Account" and "Password", enter your registered account name and password. For "Type", select New Install or Upgrade/ Re-install if you’re doing a re-install. For "Environment", you may select Home or Home Office since you’ll be using this server only as a Linux home server.

      Click "Register System" after filling those required fields.

      Once your system has been registered, you’ll gain access to ClearOS marketplace and you’ll be able to select several add-ons/application that you’d wanted to install in your ClearOS Linux home server.

      Click "Next" to go to the next step.

    • Step 6: Internet domain setup. Just enter your desired domain here, simply enter the domain name that you’ve entered during the ClearOS install process. In my case, I’ve entered chubbable.lan.

      Click "Next" to continue with the next step.

    • Step 7: Hostname setting. You need to name your system by giving it a proper hostname. On this page, you need to configure both "Hostname" and "Internet Hostname". You could enter the same name in "Hostname" and "Internet Hostname".

      So you could enter it like so: Hostname – clearos.chubbable.lan Internet Hostname – clearos.chubbable.lan

      Note: If you have services hosted on this server and you want to access it from outside of your local network, like OpenVPN service, you need to set "Internet Hostname" and give it a proper hostname with domain name or a fully qualified domain name (FQDN). For instance, clearos.chubbable.com instead of clearos.chubbable.lan. You can use a Dynamic DNS service for this, so you can get your own FQDN and you’ll be able to access your server from the internet using your server’s FQDN. DDNS service shall be first configured before you could make that hapen. More about this on my next blog post.

      Click "Next" to continue.

    • Step 8: Setup your server’s timezone. Simply select your timezone from the drop-down menu, click "Synchronize Now" and then click "Next" button to continue.

    • Step 9: Marketplace Apps Installation. This is the part where you could install whatever apps you might need to use with your server. The is the step where we install the File Server app, the OpenVPN server app, Plex app and other apps that are available in ClearOS Marketplace.

      While on the "Welcome to Marketplace" screen, click "Install apps by category" button and click "Next". Now, depending on your Internet speed, it will take some moments to retrieve the list of available Marketplace Apps.

      You could install a lot of apps from this page of the configuration wizard, but for this guide we’ll just choose some of the apps:

      • Under the "Cloud" tab, choose Dynamic DNS
      • Now click on "Gateway" tab and choose Intrusion Detection and Intrusion Prevention.
      • Switch to "Server" tab and choose Flexshare, Plex Media Server, and Transmission BT Client.
      • Switch to "Network" tab and choose OpenVPN, and Port Forwarding.

      Then click "Next" to go to the "App Review" screen and then finally click "Download and Install" button (left of Delete All button) to start the app download and installation. This will download and install all your selected apps.

      You will know that download and installation is finished once the overall progress bar is filled up. Click "Finish and Installation Wizard" button to finish the wizard.

      You should be now at the ClearOS Admin Dashboard and congratulation! You have now setup and configured ClearOS on your sytem.

      Next task would be to configure each app that we’ve installed to work within our local network.

    OpenVPN Setup

    OpenVPN is a free and opensource software that you could use to implement a Virtual Private Network. It uses SSL/TLS for it’s security protocol. You can use this to create a site-to-site or point-to-point secure connecttion.

    You could also use and implement OpenVPN as a stand-alone access server by installing it on a Linux distribution like Ubuntu or CentOS. It is also available as a software package in pfSense. Pfsense stylized as "pfSense" is another opensource application which is a FreeBSD-based software firewall. Checkout this guide if you want to use pfSense with OpenVPN.

    Procedures

    • Step 1: Allow Incoming Connection For OpenVPN Clients – You need to setup the firewall to accept incoming connection to your OpenVPN server, to do this navigate to Network > Firewall > Incoming Firewall. Click the "Add" button and select OpenVPN from the drop-down menu labeled "Service", then click "Add" button.

      Reference Image: clearos-openvpn-incoming-firewall-add
    • Step 2: Create Internal Certificate Authority – This shall be used in all and future user certificate and other internal certificate like the certificate for your OpenVPN server.

      To start off with this procedure, navigate to System > Security > Certificate Manager tab from the admin dashboard. Then fill-up the required fields.

      In my case, I did it like so: Internet Hostname – clearos.chubbable.lan Organization – Chubbable Unit – Tech City – New York State – New York Country – United States

      Then click the button "Create Certificate". Upon clicking on the button, you should be taken to another screen with a warning that mentions about "The web interface is restarting with the new security certificates.". Just click the "Continue" button to proceed. You’ll see a warning page after clicking the button, go ahead and continue, the warning just warns you about the SSL certificate. It’s safe to proceed, the warning just pops up since the certificate you’ve just created is a self-signed one. That means, it’s not signed by Certificate Authorities or providers like Symantec or Comodo.

      Two certificates in .pem format shall appear under "Certificates Manager", one for Certificate Authority and one for your server.

      Reference Image:

      clearos-certificate-created
    • Step 3: Enable User Management – You must enable this feature first before you can create a new user account for OpenVPN. Go to System > User menu, and click Initialize Built-in Directory. Wait for it to initialize until you see the "Add" button.

      Click the "Add" button to create a new user account for OpenVPN, a new screen should be shown, now fill-up the necessary fields and then click the "Add" button below those fields.

      This is how I filled-up mine: Username – userone First Name – Rolling Last Name – Pin Password – ** OpenVPN User – Enabled Security Certificates User – Enabled

    • Step 4: Create A User Certificate and Download the Configuration File – After creating your user account, log off from the admin dashboard ang login as the user you just created. So in my case, I would login as "userone" instead of "Admin".

      On the left side of your dashboard, click on "User Certificates" under "Accounts" and fill-up the Password field. This password will be use to protect the certificate, it’s a different password from your user-account password. So enter your password and click Create Certificate button.

      After clicking the button, download the OpenVPN configuration file for your platform, choose from the drop-down menu for OpenVPN "Configuration File" and click the download button. You may choose from Linux, Windows and Mac.

      Also, don’t forget to download the certificate files; Certificate (useraccountname-cert.pem), Certificate Authority (ca-cert.pem), PKCS12, Private Key (useraccountname-key.pem).

      Put the files in the same folder where .ovpn file is where at.

    • Step 5: How To Connect To The OpenVPN Server?

      Connecting to the OpenVPN server is fairly easy. You can connect from Linux, Mac, Windows or Android.

      Note: You can actually edit your .ovpn file and use your server’s IP address instead of a HOSTNAME. Open .ovpn file using a text editor and look for the line starting with remote. Change remote your-server-hostname 1191 to remote your-server-ipaddress 1194.

      Windows – First download the client software from this page. Download the appropriate version for your Windows. Then install the software by double-clicking on the .exe file. After you install it, open the GUI by double-clicking on "OpenVPN GUI" desktop shortcut. The GUI icon should now appear in your system tray. If you right-click on it, you’ll notice that there is no "Connect" menu yet, that’s because you haven’t added your VPN config file yet.

      To add your OpenVPN config files and certificate, go to the OpenVPN installation folder and look for config folder. Put your .ovpn config and certificate files there. Now, right click on your OpenVPN system tray icon, you should now see a "Connect" menu. Click "Connect" and enter your OpenVPN user-name and user-password, then click OK to make the connection.

      Linux – Download the .ovpn file for Linux and also don’t forget to download the certificate files. Place the files in the same folder and store it in a permanent location.

      Install network-manager-openvpn-gnome and openvpnfrom command-line, if it’s not installed yet.

      sudo apt-get install network-manager-openvpn-gnome openvpn

      If you’re on Linux Mint – Go to Menu > Preferences > Network Connections > Add. Then click on the drop-down menu and scroll further down until you see Import a saved VPN configuration, click on it and then click the "Create" button. Now browse to where your .ovpn config file is. Then enter your user-name, user-password and Private key password. User Certificate, CA Certificate, Private key should be auto populated. Click "Save" button. You can now click on the networking icon from your system tray and your VPN account should be available. Click on it to make the connection.

    Plex Media Server Setup

    Plex software is a great software to organizer your media files. You can put them in libraries, categories and stream them to various UPnP and DLNA clients like Android devices, Windows, MaC, Linux, SmartTV and few more others.

    Procedure

    • Step 1: To configure Plex for the first time, login as "root" to your ClearOS admin dashboard.

    • Step 2: Navigate to "Server" tab and click on Plex Media Server, then Go To MyPlex. Plex dashboard should now open and you’ll be greeted by "Plex Terms of Service" window, click "Agree" button to continue accessing the dashboard.

    Now you might ask "how to add files to my plex media server?", well there are various ways on how to add your media files. It depends on your situation or media source. Your media source could be in a single drive, in a raided drives inside a server, or maybe a NAS.

    If you stored your media files in a single big drive or raid box with SATA connection, you could simply attach it to your ClearOS server, then create a directory for the files and use rsync or similar tools to copy or sync your media files. After you transfer your files to your ClearOS server, login to your Plex admin gui and create a new media library and set the path to your media directory you’ve created. To learn more about this, read my post about adding files to a Linux media server.

    If you stored your files in another file or media server, but you are not able to detach your drives because it’s raided (either software or hardware raided), you can use flexshare and Windows networking for that to copy files from your existing media/file server to your new ClearOS server. You need to have a running home network for this. You need to create a mount point inside your ClearOS server and mount the shard folder from your existing file server. More instruction on this later in another post.

    File Server Setup

    Setting this feature in ClearOS will let you share folders and files to client machines like Windows, Mac or Linux. For this to work, you must first install "Windows Networking" from the ClearOS Marketplace, then create a group and users for the folder share.

    Procedure

    Step 1: Install "Windows Networking" module. Login as "root" to ClearOS admin dashboard and click on the marketplace icon. It’s the cloud icon with down-arrow that sits on the top-right corner of your dashboard. Use the search function on the left-side of the screen and search for "Windows Networking". Then look for the "Windows Networking" button and click on it, then click "Install/Upgrade Selected Apps". That should install the module.

    Step 2: Initialize built-in directory by clicking on Server > Windows Networking > Initialize Built-in directory. Once initialized, go to the next step below and configure "Windows Networking".

    Step 3: Configure Windows Networking by entering your desired Sever Name and Windows Domain. Also enter your admin password, winadmin shall be the default user-name for the administrator. Then click Initialize to start the service. You should be taken to another configuration screen.

    Step 4: Edit Windows Networking Mode. You can choose between two modes, Primary Domain Controller and Simple Server. In simple server, you can use the login user-name and user-password of a Windows user as the user-credentials for a shared directory. This is the mode that we would want to use. This mode makes use of "Workgroup" name instead of a "Domain" name.

    Click on the "Edit" button under the "Mode" block and click on the drop-down menu labeld "Mode", then choose "Simple Server’. Click "Update" button to save the changes.

    Step 5: Create Group. Navigate to System > Accounts > Groups and click the "Add" button to create a new group for your file server service. In my case, I named my group fileshare.

    Step 6: Create User. Create a new user-account and assign it to the group fileshare or the whatever group name you came up with. Navigate to System > Accounts > Users and click the "Add" button to create a new user-account. The user-account could be an existing user-account on your Windows-based machine, let’s say UserXP. But you don’t need need to follow the character case of the name, you could enter it in all lower-case, like userxp. You could also add additional user-account that does not exist yet on any of your Windows machine. You could create a user-account for your Linux-based machine which is not actually a user on your Linux machine.

    Fill-up the all the necessary fields and don’t forget to enable OpenVPN User and Security Certificates User, as well as ticking the group name for the user-account. Click "Add" button to save the your changes.

    Step 7: Create the folder to share via FlexShare menu. Navigate to Server > FlexShare > Click ADD button. For the purpose of illustration, I’d name my folder Shared. So I’d type that in under Share Name field. Enter description for the folder and assign it to group fileshare or the name you came up with. Set "Third Party App Access" to disabled for now. Finally click the "Add" button.

    Your dashboard will reload and you should see the "Windows File Share" block. You can see that the "Status" is set to "Disabled". To enable the folder share, click the "Edit" button and set "Status" to Enabled. You decide whether you allow read and write permission for the shared folder. Click "Update" to save your changes.

    Step 8: Accessing your shared folder. Test your configuration and see if you can access your ClearOS shared folder.

    For this guide, I’ve configured the FlexShare/Windows Networking configs like so:

    Server Name - MyServer
    Workgroup - MyLAN
    Shared Folder Name - Shared
    User Group - FileShare
    User Name - UserXP

    If you’re on Windows, you can access the shared folder name Shared under the server name MyServer by typing \\MyServer\shared. Alternately, you could browse your network location and you should be able to find your workgroup name and servername. Click on it to access your shared folder. Just make sure that the user account that is currently logged-in in Windows actually exists in ClearOS user accounts.

    If you’re on Linux with desktop environment, you could type in smb://myserver/shared/ in your file explorer’s address bar.

    You could further customize your settings by creating a read-only group and a group with read and write permission enabled.

    T0rrent Server Setup

    Transmission comes with ClearOS installation. It is very easy to install using ClearOS Dashboard by accessing the App Market Place.

    Installation Steps

    • Step 1 – Installing Transmission on ClearOS is fairly easy. Just login to your Web Console and access the Marketplace.

      To do that, do the following:

      Fire up your browser and navigate to

      https://your.clearos.ipaddress:81/app/marketplace

      Then login with your username and password.

    • Step 2 – On your left navigation menu, search for transmission and hit ENTER key.

      You should see the Transmission BitT0rrent Client icon, click to highlight it, then click Install/Upgrade Selected Apps button to initiate the installation.

      On the next screen, click on Download and Install button.

      Transmission should start installing, watch for the progress bar.

    • Step 3 – After successful installation, click on the Update Navigation Menu button and then hover your mouse on the Server button on the top of your Dashboard then click on Transmission.

      Now, start the service by clicking on the Start button from the right menu. It’s the button that corresponds to Action label.

    • Step 4 – Setup a password for your Transmission WebUI. Enter your desired password under the Password dialogue box. Then click Update button to save the changes.

    • Step 5 – Login to Transmission Web UI by clicking on Go To Transmission Management Tool button.

      Login prompt should pop-up, the default username for Transmission is admin, while password is the one you enrolled in Step 4 above.

      Then that’s it! You now setup and configured Transmission on ClearOS.

      Note: If you didn’t update the password, then just login to Transmission Web UI without entering any. Jut hit Login button.

    Software Router Setup

    This is very straight-forward to setup, especially when you have lots of experience tinkering with your home routers.

    To access the app page, go to: https://your.server.ipaddress:81/app/dhcp

    I will expand on this topic in the future, whenever I get time.

    Apps Related To This Service:

    • Bandwidth Manager
    • Port Forwarding
    • 1-to-1 NAT
    • Multi WAN
    • DMZ

    That’s a Wrap

    I hope you found this guide useful and applicable in your case, be it in an office or home use.

    Using ClearOS, you could setup a multi-in-one Linux Server. You could still add features and services to your server by installing additional apps using ClearOS Market Place. There are lots of Free or Paid application that you might find useful for your mode of operation.

    If you have something to share about Clear OS setups and configurations, or some clarifications or corrections, please feel free to post them below.

    Thanks for taking time reading this post.

  • HTPC File Server Combo Using ownCloud – Setup Guide

    HTPC File Server Combo Using ownCloud – Setup Guide

    I decided to write a tutorial today for another Ubuntu 14.04 Server based HTPC and media server setup guide. I’ve read a forum thread where the original poster is asking if there is some way to setup an HTPC File Server Combo on his machine.

    Related Topic: How to Build Your Own Cloud Server Using Nextcloud

    Some of the respondents answered by suggesting to setup a Samba server or NFS connection, but the post author isn’t skillful enough to setup the thing on his own. So I decided to wrtie this guide on how you would exactly do this, the easy way, using a FREE-AND-OPEN-SOURCE-SOFTWARE (FOSS) called Owncloud. I’ll share this guide later on the forum site. So with Owncloud, XBMC (KODI in next release) plus Ubuntu Server 14.04 LTS, we could put up a configuration that will serve as an HTPC, DLNA server, streaming media server, file server, that has a file sync feature like the one offered by Dropbox or Goostepgle Drive.

    But what the heck is Owncloud anyway?

    Stylized as ownCloud, it is generally free and OpenSource software that functions like a Dropbox (for the file Sync part). Almost all of us know that Dropbox is a free cloud-based file hosting service with file synchronization feature. It’s a free (up to 2GB) personal cloud storage service. It’s very similar with Owncloud, the difference is, you have to provide your own hardware/infrastructure where you could install Owncloud and configure it as your privately-owned cloud server or cloud storage, and file server solution. You could install and use Owncloud within your own internal network, as well as, to a cloud VPS (Virtual Private Server) like the ones offered by Amazon AWS and DigitalOcean.

    Owncloud, like any other software, you need to install and configure it afterwards to match your intended mode of operation. Like Dropbox, Owncloud has a client connection software that automatically syncs your local file/folder to your private cloud folder. It also has a WebDAV feature that you could connect to, from various clients (Smartphones and Desktops) by just accessing your webdav server address. Connecting to your account using webdav is simple and easy, just take note of your user account and your webdav address.

    ownCloud WebDAV address uses the following format:

    name-of-server/remote.php/webdav/your-personal-folder

    or

    ip-address/remote.php/webdav/

    Purpose of This Guide

    The main purpose of this guide, is to setup an Linux-based media server, a file server, a DLNA server, a streaming media server, and at the same time an HTPC, all under one machine. This build is going to be a power-saving machine that you could power-on 24 hours a day, seven days a week. You also call this as a multi-in-one htpc media server.

    Setup Requirements

    For this guide, you need a machine powerful enough to serve your desired services and mode of operation. I’m not going to run through the details, but to give you an idea, you at least a 4GB RAM, Quad-core CPU, ATI Radeon HD5400 or newer/Intel GMA X4500HD or newer, large hard-drive (or RAIDED drives) and most of all, a high-quality Gigabit Ethernet Card. You also need to have XBMC (or Kodi) and Plex already installed on your system. If you have not done this yet, then you need to follow my

    Linux-based media server guide on how to install XBMC and Plex.

    For the Owncloud Installation Part

    Since this tutorial involves Owncloud manual installation on a Linux-based machine (Ubuntu Server 14.04 LTS), it requires command-line typing using Linux terminal or Windows putty.exe. Don’t be discourage by this because I will make it very easy for you. You may copy-and-paste most of the commands and you just need to substitute the values applicable to your installation.

    For this guide, we need to do the following:

    • Connect to the target machine remotely via SSH
    • Install Apache 2 Web Server
    • Install MySQL Server
    • PHP5
    • Install Owncloud dependency packages
    • Create a new VirtualHost
    • Download Owncloud manual installation package
    • Enable VirtualHost & Install Owncloud (keep in mind that Ubuntu 14.04 LTS is the Host-OS)
    • Configure Owncloud
    • Test connect a client device/machine
    • You must be comfortable with command-line

      Note: You need putty.exe if you’re on Windows.

    The details and values used in this guide are:

    • Hostname => htpc
    • FQDN or Fully Qualified Domain Name => htpc.chubbable.local
    • User Account used from the HTPC => chubbable
    • VirtualHost or Domain Name for the Owncloud instance => cloud.loc
    • Database name used for Owncloud => owncloud
    • Database user-name used for Owncloud => owncloud
    • Database password used for Owncloud => owncloud
    • MySQL Root user-password => root
    • Admin user-name & user-password for Owncloud => admin/admin These are the values I’ve used in this guide. You should use your own values.

    Procedures

    • Step 1: Connect to your HTPC remotely via SSH.

      You could actually install Owncloud directly from your XBMC or HTPC machine, but the advantage of using SSH is that, you could easily copy and paste codes in your command-line and you don’t have to manually type in the long syntaxes for the installation. To connect to your target machine using SSH, open up putty.exe or a terminal in Linux (ctrl + t), then type in ssh [email protected]. chubbable is my user-name on my HTPC machine with a static IP address of 192.168.1.252 If it’s your first time to connect, you’ll be greeted with a message The authenticity of the blah... blah..., make sure that you’re connecting to your target machine, type yes and press enter to continue. You should be now logged-in remotely to your HTPC machine.

    • Step 2: Download the latest version of ownCloud.

      To do this, head over to https://owncloud.org/install/ and click the button labeled Archive Files For Server Owners. A new mini-window should pop-up. Reference Image: [jig ids="1754"] From the pop-up window, you should see a list of available choices. In this case, you need to download the Unix package for ownCloud in an archived file. From the number one entry, right click Unix link and choose Copy link address from the context menu.

      Reference Image:

    • Step 3: Install Apache2 web server and other dependency packages.

      Since ownCloud is a web-based application, it needs to have a web server to run on. Just like any other web-script (ie. Wordpress), it requires a web host to be installed on. So for this step, we need to install Owncloud’s dependency packages and at the same time install Apache 2 web server, MySQL Database server and PHP (plus important modules). You could just copy and paste the codes used in this step. You just have to substitute the values that are most applicable to your case. To continue with this step, copy the following code and paste it in your command-line, then press ENTER key. Input your user-password when asked.

      sudo apt-get install lamp-server^ php5-gd php5-json php5-curl php5-intl php5-mcrypt php5-imagick -y

      It’ll take around 10 minutes for this to finish. It depends on your Internet and system-drive’s speed. During the installation process, a new screen should pop up similar to the image shown below.

      Reference Image:

      Nominate a password for the MySQL Database root user account. So input your password, then hit ENTER key. You’ll be asked to enter it twice for confirmation and double-checking. Installation should continue.

      After the install process, you should be back to your command-line. chubbable@htpc:~$

      Now, you’re ready for the next step.

    • Step 4: Create the document root folder for cloud.loc. To do this, copy and paste the following code and press ENTER key:

      sudo mkdir /var/www/cloud.loc

      Create ssl folder to hold your SSL Certificate files:

      sudo mkdir /var/www/cloud.loc/ssl

      Create logs folder to store your log files:

      sudo mkdir /var/www/cloud.loc/logs

    • Step 5: Copy the owncloud folder or better yet move it to your virtualhost’s document root by typing the following command.

      sudo mv owncloud /var/www/cloud.loc/

      To confirm that you actually move the whole folder, type

      cd && ls /var/www/cloud.loc

      You should see the folders owncloud, ssl and logs.

    • Step 6: After the above step, set permission to your ownCloud document root by copy-pasting the following command:

      sudo chown -R www-data:www-data /var/www/cloud.loc/owncloud

      sudo chmod -R 755 /var/www/cloud.loc/owncloud

      Open and edit the hosts file and insert cloud.loc:

      sudo nano /etc/hosts

      add cloud.loc beside 127.0.0.1

      Note: You may change cloud.loc to anything you want.
      Add your domain name to your client machine’s hosts file. If you’re on Linux, you could do this by typing this in your commandline: sudo nano /etc/hosts Then write a new line of text and add the IP address of your XBMC or HTPC machine and then your domain name.

      This requirement should be done on your client machine,

      not your XBMC or HTPC machine. In my case, I did it like so:

      192.168.1.252 cloud.loc

      Save the file by pressing

      ctrl + o -> Enter -> ctrl + x.

      To do this in windows XP/7/8, navigate to system-folder\system32\drivers\etc</code> and edit the file hosts. It's a hidden file, so you need first to enable Show hidden files option in Windows EXplorer.

    • Step 7: Create a Self-signed SSL Certificate For your ownCloud instance.

      You need a self-signed certificate to be used with your SSL virtualhost in Apache. Creating this certificate is simple, you may just copy and paste the commands below. This step should enable https connection in ownCloud.

      Create the SSL Certificate. Copy-paste the command to create the certificate:

      sudo openssl req -x509 -nodes -days 3650 -newkey rsa:2048 -keyout /var/www/cloud.loc/ssl/owncloud-ssl.key -out /var/www/cloud.loc/ssl/owncloud-ssl.crt

      A new screen should open and will ask for various details like Country and State. This is how I entered my data:

      • Country Name (2 letter code) [AU]: US
      • State or Province Name (full name) [Some-State]: New York
      • Locality Name (eg, city): New York City
      • Organization Name (eg, company) [Internet Widgits Pty Ltd]: Chubbable
      • Organizational Unit Name (eg, section): Tech
      • Common Name (e.g. server FQDN or YOUR name): cloud.loc
      • Email Address: [email protected]

      You can now check for the files from the ssl folder inside /var/www/cloud.loc

      cd && ls -l /var/www/cloud.loc/ssl

      You should see owncloud-ssl.crt and owncloud-ssl.key file.

      Now you might wanna ask your self, how to use SSL in ownCloud?

      The answer can be found in the next step below.

    • Step 8: Create an SSL VirtualHost.

      This is the part where you will use the SSL files you've generated from the previous step above. After successfully creating the certificate files, you now need to create the SSL virtual host for your domain. To do this, copy the file default-ssl.conf from /etc/apache2/sites-available/default-ssl.conf and paste it to a new file called ssl-cloud.loc.conf.

      To do that, type the following and press Enter key.

      sudo cp /etc/apache2/sites-available/default-ssl.conf /etc/apache2/sites-available/ssl-cloud.loc.conf

      Add the path to your SSL certificate files, open the file by typing:

      sudo nano /etc/apache2/sites-available/ssl-cloud.loc.conf

      Edit the file to look something like this:

      <ifmodule mod_ssl.c>
      <virtualhost _default_:443>
          ServerAdmin [email protected]
          ServerName cloud.loc
          ServerAlias www.cloud.loc
          DocumentRoot /var/www/cloud.loc/owncloud
          ErrorLog /var/www/cloud.loc/error.log
          CustomLog /var/www/cloud.loc/access.log combined
      
          SSLEngine on
          SSLCertificateFile /var/www/cloud.loc/ssl/owncloud-ssl.crt
          SSLCertificateKeyFile /var/www/cloud.loc/ssl/owncloud-ssl.key
      
          <filesmatch "\.(cgi|shtml|phtml|php)$">
          SSLOptions +StdEnvVars
          </filesmatch>
      
          <directory /usr/lib/cgi-bin>
          SSLOptions +StdEnvVars
          </directory>
      
          BrowserMatch "MSIE [2-6]" \
          nokeepalive ssl-unclean-shutdown \
          downgrade-1.0 force-response-1.0
          BrowserMatch "MSIE [17-9]" ssl-unclean-shutdown
      
          <directory /var/www/cloud.loc/owncloud>
          Options Indexes FollowSymLinks MultiViews
          AllowOverride All
          Require all granted
          </directory>
      </virtualhost>
      </ifmodule>
      

      Save the file, and enable the SSL virtualhost.

      To do this:

      sudo a2ensite ssl-cloud.loc.conf && sudo service apache2 restart

      If there is no error upon Apache restarts, then you've successfully enabled your SSL VirtualHost.

    • Step 9: Create a Virtualhost for your ownCloud instance.

      This virtual host will host your domain for your Owncloud instance. In my case, I named my domain like so, cloud.loc. For this step, you need to create a new virtualhost and set the document root to be used by Owncloud. To do this, create a new .conf file for your Owncloud virtualhost. It's better to use a file name that reflects your domain name. In my case my local domain name is cloud.loc, so I would name my .conf file like so, cloud.loc.conf.

      To create the file, type or copy this:

      sudo nano /etc/apache2/sites-available/cloud.loc.conf

      A new black screens should pop up. Copy and paste the block of codes and the save the file by pressing

      ctrl + o -> ENTER -> ctrl + x.

      <virtualhost *:80>
      ServerName cloud.loc
      ServerAdmin [email protected]
      DocumentRoot /var/www/cloud.loc/owncloud
      ErrorLog /var/www/cloud.loc/logs/error.log
      CustomLog /var/www/cloud.loc/logs/access.log combined
      <directory /var/www/cloud.loc/owncloud>
          Options Indexes FollowSymLinks MultiViews
          AllowOverride All
          Require all granted
      </directory>
      </virtualhost>
      

      Note: Substitue the correct path in your case. Save the file and exit. Then enable your newly created virtualhost by invoking the following command:

      sudo a2ensite cloud.loc.conf && sudo service apache2 restart

    • Step 10: Enable Apache Mods for ownCloud.

      sudo a2enmod rewrite ssl headers && sudo service apache2 restart

    • Step 11: Check your ownCloud domain and see if it'll connect via HTTPS connection.

      Access your ownCloud domain using https://cloud.loc If you see a splash page saying This Connection Is Untrusted using Firefox, then that's a good indication that you've configured SSL in ownCloud correctly.

      To continue, click I Understand the Risk and then Add Exception -> Confirm Security Exception.

      You should be then redirected to the Admin Web-GUI.

      In Google Chrome, you'll see a page like this:

      You just need to click Proceed Anyway button to continue logging in.

      • Step 12: Create a new database for ownCloud installation.

      First login as root to MySQL server via commandline.

      Type-in the below code and hit ENTER key.

      mysql -u root -p

      You'll be prompted to enter your MySQL root password (the you entered during Step 3), enter it and press enter key.

      You should now see a new command-line starting with mysql>

      Create the new database by typing the following command and press ENTER key.

      CREATE DATABASE owncloud;

      Create new user and grant privileges to the new database.

      GRANT ALL ON owncloud.* TO 'owncloud'@'localhost' IDENTIFIED BY 'owncloud';

      Then reload user privileges to set the privileges for the user.

      FLUSH PRIVILEGES;

      Done! Exit the prompt by typing exit + enter key.

      Switch to your browser and access your domain name. Then proceed to the next step.

      Note: owncloud and admin are for illustration purpose only. Use your own values.

    • Step 13: Install ownCloud by initiating the installation wizard.

      Browse to cloud.loc and fill up the necessary fields on that page.

      In my case, I've filled up the fields like so:

      • admin user-name => admin
      • admin user-password => admin
      • database user => owncloud
      • database password => owncloud
      • database name => owncloud

      After filling the necessary fields, click Finish setup button and you should be taken to the ownCloud admin page.

      If you reached the page similar to the image shown above, then you've successfully installed ownCloud on Ubuntu Server 14.04 LTS.

      To configure it as a file server with XBMC/HTPC, follow the post-install guide and configure ownCloud from it's Web-GUI.

    Post Install Configuration

    The next task that you need to do is to enforce https connection to your ownCloud server. This settings will always redirect a user to the secure side of your server.

    If a user just typed cloud.loc in the address bar, owncloud will redirect it to https://cloud.loc

    So how to always enable HTTPS in ownCloud?

    To enable HTTPS connection to your ownCloud-based file server, you need to login in again using the https protocol. So if you're logged in right now, logout first and then login again using https://cloud.loc. Then navigate to main admin menu from the top-right corner of the page, then hover your mouse to Admin and click it, scroll down a little further till you see the Enforce HTTPS check-box. Tick the box and you're done.

    Using The File Sync Feature

    To use this feature, first create a client user account from the administration page. You may assign a group for this account and also provide disk quota. Doing this is very straight forward, thanks to ownCloud's simple, clean but feature rich web-ui. After creating the account, install the client software which can be downloaded from

    this page. You may choose and download the client software for either desktop clients or mobile devices. After downloading the client app, install and run it from your device. Installing it is fairly easy, especially on Windows and Mac.

    To connect from Windows machines, run the app and fill up the Server Address in the following format:

    https://ipaddress/

    or

    https://domain-name

    Then click next, a new window should pop-up warning you about SSL connection, double check the certificate and tick Trust this certificate and finally click ok.

    You should be then taken to the login windows. Now fill up the user-name and password field and click next.

    The next dialog will let you choose your local folder, you may choose another folder or just accept the default folder path, which is profile-name\owncloud.

    Click Connect then FINISH.

    ownCloud should be running now already and minimized in your system tray like Dropbox does. Now you're ready to make the sync.

    Connecting from Mac or Linux is very similar, so you may just use this Windows guide as a reference.

    Connecting To WebDAV

    After a successful installation, you got really excited and you wanted to test the server straight away. So you might ask, how to connect to ownCloud?

    Connecting to ownCloud is fairly easy, you just need to get your WebDAV server address. In this case, my server address is https://cloud.loc/remote.php/webdav/. You could use an IP address instead of a domain name.

    How to connect using Linux Mint? Connecting to ownCloud from a Linux Mint desktop is fairly easy, just open up your file explorer (ie. nemo) then go to main menu then:

    Click File -> Connect To Server

    A new pop-up mini-window should open. Fill up:

    • Click Type drop-down menu and select Secure WebDAV (HTTPS)
    • Fill up Server: with cloud.loc/remote.php/webdav/
    • User Name and Password

    Note: Do not include the https or http when filling up the Server field, else it will throw an error saying, HTTP Error: Cannot resolve hostname (https). Finally, click connect to make the connection.

    Connecting from Mac is fairly easy too and very similar. Just open up your explorer then go to main menu -> Go -> Connect to Server. How to connect from XBMC? To connect to ownCloud using XBMC, go to Video -> File -> Files -> Add Videos. Then click Browse -> Add Network Location.

    A new mini-window should pop-up. The fill up the fields like so:

    • From the Protocol option menu, select WebDAV server (HTTPS)
    • Fill up Server address with cloud.loc or just an IP address
    • Fill up Remote path with remote.php/webdav
    • Fill up user-name and user-password
    • Finally, click OK to make the connection Then continue adding media files the usual way. Thats it! Reference Image:
    Screenshot: Connecting XBMC to ownCloud WebDAV

    Conclusion

    With the power of Open Source projects, you can accomplish many things on top of ordinary. As you have witnessed in this guide, we've installed a web-server plus ownCloud in addition to your existing XBMC-based HTPC and Plex media server. This is made possible by our Host-OS, which is Ubuntu 14.04 LTS server. In this guide, you've learned how to install owncloud in Ubuntu 14.04, and also, you've build yourself an HTPC-File-Server combo from scratch using free downloadable software. So if you've completed this guide successfully, pat yourself on the back. For those who need further help or anyone who wants to improve this post, feel free to make a comment below. Thank you all for taking your time in reading this setup guide.

  • How To Setup An Ubuntu-based Media Server with DLNA Support, Using XBMC and Plex Software

    How To Setup An Ubuntu-based Media Server with DLNA Support, Using XBMC and Plex Software

    Hello media server lovers and HTPC enthusiast! I'm back for another Ubuntu-based guide on how to set things in your Linux-based HTPC or media Server. For this guide, I'm going to show you the step-by-step procedure on how to setup a media server with DLNA/UPnP support, using two free-download-able software.

    For the DLNA and UPnP part, I'll be using Plex Media Server to serve media files to various DLNA/UPnP capable clients. While for the HD media playback, I'll be using XBMC as the front-end application.

    Introduction

    Some of you might ask why combine Plex with XBMC? Well, the main reason for this is, XBMC (v13.1 Gotham & previous versions) is not capable of transcoding media files. Meaning,it serves and play files "as is".

    Note: Transcoding is a process where you use a computer and computer application to convert one media format to another format. Like, MPEG-4 to H.264 format conversion.

    Though XBMC is capable of playing back almost all sorts of audio and video formats around, it's not capable of converting media files, for proper play-back to DLNA or UPnP capable devices (like, PS3, SmartTV, Tablets and SmartPhones). This means that, XBMC can only act as a media player and media source for supported DLNA/UPnP capable client devices. And that, these client devices can only playback a file that it natively supports. So it couldn't play a file from XBMC's media library if that particular file is not supported under a particular device. While XMBC can handle almost all known media formats around, not all DLNA clients and UPnP devices could handle all the known media formats that are currently being used today.

    Smart-Phones, Smart-TV and Stream Boxes are limited to to their hardware's media decoding capability. So you have to re-encode your existing video files to match with your device's supported format. Like for instance, you have a video collection that are encoded with H.264 MP4 format, and your SmartTV can only playback a file encoded with MPEG-AVC format. So what you do first is to re-encode your H.264 video to MPEG-AVC video format so your TV can play it back without issues. So in this example, you need to store 2 video formats for one movie title in your XBMC movie library. And this in my opinion is not so practical if you have more than one DLNA/UPnP capable devices. Because you need to convert each movie title to each video format that your device could able to playback.

    And what if you have thousands of HD video files and you want to stream those files to a 3GP-only capable SmartPhone or to your old PC that can't handle at least a 720p HD movie? The seemingly answer to this is would be, convert all your videos to match each format (avi for pc, 3gp for cellphone or mp4 for PSP), that your device could handle -- which is so impractical. Though I said it's impractical, I've done this before when I was still starting with XBMC and Linux Servers.

    I wasn't using on-the-fly transcoding at that time. Take a look at the image below, that's how I organized my files, 1 movie title with 3 video formats.

    With the use of software with encoding and transcoding feature we could avoid those things I've mentioned above. You don't have to transcode or encode each video files, prior to streaming or playing it back to DLNA and UPnP capable devices. If your hardware is powerful enough to encode/transcode a video on-the-fly, then that would be great because you don't have to re-encode your files anymore just to play it back properly in your phones or whatever device you might have. So in this guide, I'm going to show the step-by-step procedure to enable transcoding/encoding capability in your HTPC, Media Server, or Linux Server, using XBMC and Plex Software. Please read the requirements below before starting with this guide.

    Purpose of This Guide

    The main purpose of this guide is to help you install Plex and XBMC and set it up in your Linux-based HTPC or Media Server. We'll configure Plex so it could perform on-the-fly transcoding, eliminating the need of prior encoding or transcoding of video files before streaming to a DLNA/UPnP capable devices. We'll use XBMC as our HTPC front-end application while Plex shall be setup to take care of the DLNA and UPnP services, and shall serve as media source or media server for XBMC's media library and other media devices. XBMC has a DLNA feature already built-in with it, but we're not going to use that since it is not capable of transcoding. Plex is the best tool for this setup, because we can set it to serve and transcode files on-the-fly while streaming to various media devices.

    Requirements For Ubuntu-based HTPC

    Since your server will be running both XBMC and Plex media server on the same machine, it's recommended to follow the below system requirements for your build. But to have an idea about each software's system requirements,

    check this link for XBMC's minimum system requirements and this link for Plex' minimum system requirements.

    Minimum System Requirements - with transcoding support:

    • At least a Dual-core Processor 2.4 GHz
    • For multiple transcoding, for multiple devices, a faster CPU may be required
    • 2GB Memory, at least
    • GPU (Radeоn HD 5400 Series or newer, Intel GMA X4500HD or newer, Nvidia GeForce 8-Series or newer) to support hardware-based decoding.
    • 30GB Hard Drive (at least) for system drive
    • Ubuntu 14.04 Server 64-bit
    • XBMC and Plex Software Package Installers

    Part 1: Ubuntu Server 14.04 Installation

    This would be the first part of the step-by-step procedures of this guide, you may skip this step if you already had installed Ubuntu.

    But if not, then follow this guide on how to setup a headless Ubuntu Server. The guide will teach you how to install the server edition of Ubuntu.

    Part 2: Plex Media Server Software Installation

    I've already posted a guide for this. Just follow the guide on

    How To Install Plex Media Server in Ubuntu, and get back to this page to continue with Part 3. But if you got it installed already, then proceed to Part 3 and follow the XBMC procedures.

    Part 3: XBMC Installation

    For this part, you need to prepare yourTerminal app if you're on Linux or Putty.exe if you're on Windows.

    Double check your network and your target machine, make sure it is connected to your network. Take note of it's IP address. To install XBMC in Ubuntu Server Edition, you need to add it's PPA repository first to Ubuntu's source list. Then we need to install a light-weight window manager for Ubuntu so we can start XBMC's front end interface. Be reminded that we're installing XBMC on a GUI-less Ubuntu, so you got no icons to click on and no mouse pointer to click with. We do all the installation commands using the command-line. But you may just copy-and-paste the commands from this guide and substitute the values that could be applicable with your case. This is a two-part installation guide, first part is XBMC guide and the second is the Linux window manager installation. So let's start.

    Part 3-A: XBMC Setup

    • Step 1: Launch a terminal if you're on Linux or Putty.exe if you're on Windows.

      Let's access our target machine and login using SSH.

      In my case, I'm logging in from my Linux Mint machine.

      Type the following in your command-line:

      ssh [email protected]

      Reference Image:

      xbmc-dlna-plex-xinit-install-step-1

      Change chubbable with your own username and the IP address with your machine's IP address.

    • Step 2: Install XBMC's dependencies, type the following and press enter.

      sudo apt-get install python-software-properties pkg-config \ software-properties-common xinit -y

      You can copy the whole texts and paste it to your command-line.

      Reference Image:

      xbmc-dlna-plex-xinit-install-step-2
    • Step 3: Let's add XBMC's official PPA by typing the following and press enter.

      sudo add-apt-repository ppa:team-xbmc/ppa

      Press Enter again when asked.

      Reference Image:

      xbmc-dlna-plex-xinit-install-step-3
    • Step 4: Update the sources list to pull down fresh data, and that includes XBMC's package information.

      Type the below command and hit enter.

      This will update packages and will install XBMC in one command.

      sudo apt-get update && sudo apt-get install xbmc-standalone -y

      This will take around 10 minutes or below to complete the installation.

      After the installation, you can't launch it's interface yet.

      We still need to create a user to run XBMC session.

    • Step 5: To enable XBMC to start automatically on boot, we need to allow X to start from non-consoles.

      So we need to configure it to allow from anyone or anybody.

      Type the following commands and hit enter.

      sudo dpkg-reconfigure x11-common

      A new window should pop-up, select Anybody (down key) and hit ok button (press tab + enter).

      Reference Image:

      Screenshot: XBMC-DLNA-Plex Installation Guide, X11 Config
    • Step 6: Create a new User to run XBMC's session. Enter the following command, to add xbmc to the lists of users. sudo adduser xbmc Enter your desired password twice, in my case I used xbmc for user and password.

      Note: When typing your password, it will not be shown on your screen, not even a mask or asterisk.

      Reference Image:

      Screenshot: XBMC-DLNA-Pllex Installation Guide, Step 6
    • Step 7: Create a script to auto-start XBMC upon user login.

      sudo nano /etc/init/xbmc.conf

      And copy the following and paste (right-click paste) it to your command-line

      # Autostart script: Thank you "Matt Filetto" for authoring this.
      
      env USER=xbmc
      start on (filesystem and stopped udevtrigger)
      stop on runlevel [016]
      respawn
      
      script
      exec su -c "xinit /usr/bin/xbmc-standalone -- -nocursor :0" $USER
      end script

      Save the file by pressing

      ctrl + o -> enter -> ctrl + x.

      Then do the following: sudo chmod a+x /etc/init/xbmc.conf

    • Step 8: We're almost there, lets test our configuration and do a reboot.

      Reboot your XBMC machine by typing: sudo reboot Now, watch your XBMC machine and reboots straight to XBMC's front-ui.

      If it booted straight to the User Interface, then you've successfully installed and configured XBMC. If not, then you might have done something wrong. Review the steps above and make sure you did it correctly.

    • Step 9: If it booted up correctly, then you did it! You may now proceed to Part 3B of this guide.

    Part 3-B: XBMC-Plex Configuration

    This part of the guide will cover the steps on how to configure XBMC with Plex Media Server. DLNA and UPnP setup shall also be covered in this guide, so make sure your media files and media drives are ready. For this guide, where going to configure XBMC as our HTPC's front-end, while we set Plex Media Server as the backend server for our media files, as well as, DLNA and UPnP server for known DLNA certified devices (Smart-TVs, SmartPhones, StreamBoxes and etc.)

    We're going to use an XBMC add-on for this, which is PleXBMC.

    This add-on will let your play media files served by Plex Media Server. So in addition to XBMC's own media collection, you could also play media files from Plex's media library. Remember that we've installed a stand-alone version of XBMC on a server edition of Ubuntu 14.04. We need again to use the command-line to download and configure the Plex addon for XBMC. So let's get started.

    • Step 1: Let's SSH again to our XBMC machine using our terminal (Putty.exe if you're on Windows). Then let's download the source file for Plex's XBMC-addon.

      Go to your command-prompt again and make sure you're on your HOME directory. If not, just type cd ~ and press ENTER.

      Your command-line should look similar to this:

      chubbable@htpc:~$

      Copy the command below and paste it (right-click paste) to your command-line and press enter:

      wget http://hippojay.github.io/repository.plexbmc.addons/download/repository.plexbmc.addons/repository.plexbmc.addons-3.0.0.zip

      That should download the PleXBMC add-on to your XBMC machine remotely. After downloading the file, you should switch to your XBMC box and manually install the add-on from there, using the front-end GUI.

    • Step 2: To install the add-on, use your keyboard to navigate to the downloaded file and install it using the XBMC-GUI.

      Before we install the add-on, we need to enable XBMC's Webserver service first.

      To do this, navigate to:

      System -> Settings -> Services -> Webserver,

      then enable Allow control of XBMC via HTTP by pressing Enter key.

      This will allow other applications like Plex, iOS and Android Apps control your XBMC box remotely.

      To install the PleXBMC add-on, navigate to

      System -> Settings -> Addon.

      Then select Install from zip file, then select file location. The add-on file should be under Home folder, so select it and press enter key.

      Browse to select repository.plexbmc.addons-3.x.x.zip, then press Enter again to install it.

    • Step 3: While still under Addon page, navigate to

      Get Add-ons then PleXBMC Add-ons for XBMC -> Services -> PleXBMC Helper and Install.

    • Step 4: While still under Addon page, navigate to Video Add-ons, just below Services menu.

      Then select PleXBMC, press Enter key and Install the addon. After this, hit backspace a few times until you reach the main front-end menu. Select the Power icon to reboot your XBMC box.

      Reference Images: [justified_image_grid ids="1438,1439,1441,1440,1442"]

    • Step 5: After rebooting your machine, a notification message should appear (bottom-right corner), stating PleXBMC Helper has started.

      This indicates that the PleXBMC add-on have been successfully installed and configured.

      Reference Image: Screenshot: PlexBMC Add-on Install Success - Under XBMC

      To continue with the procedure, navigate to Videos -> Add-ons -> PleXBMC.

      You should be taken to a new menu page. Now, navigate to -> Movies menu to browse Plex's media library remotely from within XBMC.

      If you see a lists of media categories, then you've connected successfully to the DLNA/UPnP service.

      Reference Images: [justified_image_grid ids="1443,1444"]

      At this point, you already have access to Plex Media Server's UPnP/DLNA service, using PlexBMC add-on.

      But there is another mode to access your Plex Media Library using XBMC as DLNA/UPnP Client.

      To do this, follow the steps below.

      • Step 5.1: Navigate to Videos -> Files -> Add Videos -> Browse -> UPnP.

      Then wait for a few seconds 'till it shows your Plex Media Server machine's name. Keep in mind that you must have already configured Plex as DLNA server, and that you have disabled DLNA service from XBMC. When you see your Plex machine already listed in this page, select it and hit OK button to continue.

      • Step 5.2: Navigate to folder Video -> Movies -> All Movies and then hit OK button.

      You'll be taken to a confirmation page, hit OK once more and you Plex Video Library should be now accessible via XBMC.

      To access the folder from XBMC's interface, navigate to

      Videos -> Files -> The-Name-Of-Your-Plex-Media-Library.

      Note: If you wanted to use XBMC's Movie Menu, then just add the folder path to your movie files as media source for your XBMC Movie Menu. So your XBMC movie folder, shares with Plex's media folder, under the same machine.

    • Step 6: Configure transcoding feature from Plex and enable DLNA service, but disable it from XBMC.

      • 6.1: To disable UPnP/DLNA service from XBMC, navigate to:

      System -> Settings -> Services -> UPnP.

      Then disable Share video and music libraries through UPnP and Look for remote and UPnP players.

      Just select the entry with directional keys and press enter to enable/disable it.

      • 6.2: Enable DLNA from Plex

      Open a browser and navigate to

      http://ipaddress-of-your-server:32400/manage,

      then from the upper-right corner of the page, click the wrench icon to open the settings page.

      Click Server from the left-hand part of the page and then click Show Advanced menu under it.

      Then from the left-pane, look for DLNA menu and click on it, new page should open.

      Enable DLNA by ticking the check-box, then click save changes. You have now configured DLNA service under Plex.

      • 6.3: While still under the settings page, configure transcoder setting by clicking Transcoder menu from the left-pane, and then click Show Advanced menu from the upper-right pane.

      Look for a drop-down selector labeled Transcoder quality, and click on it and select Automatic.

      You may set this in automatic settings for now, but you may experiment with the other settings (ie: prefer higher speed or higher quality encoding). Click Save Changes and you're done.

      And that's it! You've configured XBMC with Plex as it's media back-end and DLNA server.

      In case you didn't follow the written guide, I've prepared a video guide on how to do the steps mentioned above.

      So for visual learners like you, watch the video guide from my youtube channel.

    Part 4: DLNA and UPnP Client Connection

    Setup and Testing So we already have configured Ubuntu XBMC, DLNA in Plex's settings, now it's time to test our setup and playback some files to our client device or application. There are various ways to test if a DLNA or UPnP client would be able to connect to your XBMC DLNA server. One way is to use another instance of XBMC by using Plex's media library as source and another by using the PleXBMC add-on, which we've already configured from the steps above. Another is to use software client such as

    Windows Media player as DLNA client or third-party apps like BubbleUPnP. -- Please see list of UPnP clients for your reference.

    • Using XBMC folder source feature. Add Plex media collection just like when you're adding a folder location as media source in your XBMC setup.

    To find out how you would do this, watch my short

    • Using DLNA capable software like BubbleUPnP.

    to see how I've set it in an Android-based device.

    Conclusion

    What we have accomplished here, is that we've created a media server and streamer, an HTPC, and a DLNA/UPnP server, all under one box. We have configured Plex Media Server as our media back-end, a DLNA and UPnP Server, and the most notable feature is, its encoding or transcoding capability. The very advantage of this is, you don't have to encode your media files prior to streaming. So for instance you have a 1080p MKV movie file that you wanted to stream to your Smartphone, but couldn't handle it, Plex's on-the-fly transcoding capability will effectively handles this and let's you stream your file to a compatible format with your DLNA/UPnP capable Smartphone or any devices you might have. On top of this, you could easily attached another XBMC box to your network and configure it to use your Plex + XBMC box as your DLNA/UPnP server and streamer. I hope this guide had helped you in building your XBMC-DLNA media server. If you have questions or comments with regard to this guide, please feel free to write your comments below.

  • How To Setup a Web Server on Ubuntu 14.04 or Windows

    How To Setup a Web Server on Ubuntu 14.04 or Windows

    Another noob-friendly guide on how you would put up a web server instance, either on a VPS or on your local computer (localhost). It's a step-by-step instruction (For Windows & Linux) with reference images.

    So if your looking to learn on how you would exactly do this stuffs on your own, then read further below and gather all the necessary requirements for this guide before starting off.

    You could use this guide to make either a development web server, lab for learning purposes, or production environment where you can deploy or launch an application or website for public use.

    You may use the jump links below to go to a specific part of this tutorial.

    Jump Links

    Basic WebServer Requirements

    These are the basic hardware specs you need in putting up a web server. Take note we'll be using Ubuntu Server 14.04 LTS, there is no GUI or desktop environment shipped with this version of Ubuntu, so do following requirements is sufficient enough to run a web server.

    System Specs:

    • At least 512MB or RAM
    • At least 1Ghz of Processing Power
    • At least 1GB of Hard Disk Space
    • Ethernet Card for Network Connection

    Software Specs:

    For this guide we are not using Nginx, instead we'll use Apache. I will write a separate post about using NGINX as a web server.

    • Ubuntu Server 14.04 LTS
    • Apache 2.4
    • MySQL
    • PHP 5.x
    • Git (optional)

    If you want a Windows-based setup (Lab or Development Environment Only):

    • XAMPP
    • WAMP Server
    • USB Web Server

    Setting Up A Web Server on a VPS or Virtual Machine

    These are the instructions on how to set up a web server for production purpose or for public use.

    For this, you need an Ubuntu 14.04 installed on a VPS, plus you need to setup some basic security measures for your server. Read and follow the guide on how to setup a vps using Ubuntu Server 14.04.

    After setting up your VPS, you can get started with the first step below.

    Method 1

    Step 1: Login to your VPS using SSH connection.

    If you're setting up a production server, then usinng a password-less connection using SSH Keys is a must. It's optional if you're setting it up on a practice or lab environment.

    If you're on Windows you may use PuTTy, if on Linux use your Terminal.

    Make sure you followed the guide on how to create an SSH Key pair. In case you missed that part, then watch this videos.

    • [video_lightbox_youtube video_id=-92wEg68SKQ&rel=0;autoplay=1 width=768 height=432 anchor="Creating SSH Keys on Windows"]
    • [video_lightbox_youtube video_id=2zyTw1muDYw&rel=0;autoplay=1 width=768 height=432 anchor="Creatng SSH Keys on Linux"]

    If everything is set up, fire up your chosen Terminal Emulator (PuTTY or Terminator) and type this in your command-line:

    ssh username@your-vps-hostname

    or

    ssh username@your-vps-ipaddress

    or

    ssh [email protected]

    If you changed your SSH port, then you should connect like so:

    ssh -p port-number username@your-vps-hostname-or-ipaddress

    or

    ssh -p 2222 [email protected]

    Step 2: Pull down system updates and install them.

    You need to update your system first to install the necessary security and application updates for your system. This needs Internet connection.

    Type this in your command-line.

    sudo apt-get update && sudo apt-get update

    Step 3: Install L.A.M.P Stack.

    LAMP is an abbreviation of Linux Apache MySQL PHP

    To install it using the command-line, type the following;

    sudo apt-get install lamp-server^

    It should take a while to finish the installation. Once installed, you can check the version of each software installed on your system.

    How To Check Apache Version On Linux?

    Type this in your command-line

    apachectl -V

    How To Check MySQL Version On Linux?

    Type this in your command-line, and enter your mysql root password;

    mysql -u root -p;

    You should see similar output like this one;

    Reference Image:

    how-to-setup-a-web-server-check-mysql-version

    Then quit to exit.

    How To Check PHP Version On Linux?

    Type this in your command-line;

    php -v

    Step 4: Check & see if Apache is working properly.

    Fire-up your favorite web browser and point to the IP address of your Ubuntu Server or your Virtual Machine (or VPS).

    You should see the default Apache index page.

    Reference Image:

    how-to-setup-a-web-server-default-apache-page

    If you see similar image, then congratulations! You now have created an insance of Apache Web Server using Ubuntu 14.04.

    Step 5: Enable Basic Apache Modules

    Let's enable the following basic Apache modules, which are commonly needed for a website (SSL and Rewrites).

    Type this in your command-line;

    sudo a2enmod ssl rewrite

    Enter your password if you needed to, then restart Apache by doing;

    sudo service apache2 restart

    Step 6: Create A Virtual Host

    Let's say you wanted to host a Wordpress website on this server, so we need to create a folder for that and put it inside /var/www/

    So let's do like;

    sudo mkdir /var/www/wordpress.loc

    You should now have a new folder inside of /var/www/ directory. This folder should contain Wordpress files or any other CMS script or web pages.

    Step 7: Set Directory Permission On Virtual Host Folder

    We need to set permission to be owned by a user on your system. We do it like this;

    sudo chown -R $USER:$USER /var/www/wordpress.loc

    or if you want it to be owned by a specific user on your system, type this;

    sudo chown -R username:username /var/www/wordpress.loc

    Then modify folder permission and type the following command;

    sudo chmod -R 755 /var/www/wordpress.loc

    Note 1: If you're doing this on a local Virtual Machine, substitute wordpress.loc with your website name or desired name. Then map it from your /etc/hosts file. Edit the file by typing sudo nano /etc/hosts then create a new entry just below 127.0.1.1.

    Note 2 If you're doing this on a remote VPS for public use, then you need to set your DNS to point to your host.

    Enter...

    server.ip.address hostname

    or

    xxx.xxx.xxx.xxx wordpress.loc

    Step 8: Create Virtual Host File

    We need to create a Virtual Host file so Apache will now where to look for your website resource files.

    We need to set directives for i.e wordpress.loc.

    Using your command-line go to /etc/apache2/sites-available, by typing the following;

    cd /etc/apache2/sites-available

    Then create a new file by typing;

    sudo nano wordpress.loc.conf

    And enter the following;

    <VirtualHost *:80>
      ServerName www.wordpress.loc
      ServerAdmin [email protected]
      DocumentRoot /var/www/wordpress.loc
      ErrorLog ${APACHE_LOG_DIR}/error.log
      CustomLog ${APACHE_LOG_DIR}/access.log combined
    </VirtualHost>

    Save the file by typing CTRL + O > ENTER then CTRL + X to exit the editor.

    Step 9 Create a confirmation index page.

    Create a simple index.html page inside of /var/www/wordpress.loc folder.

    sudo nano /var/www/wordpress.loc/index.html

    The content should be like this...

    
    <html>
    
    <head>
    
    <title>Success!</title>
      </head>
    
    <body>
    
    <h1>Success! wordpress.loc is working!</h1>
      </body>
    </html>

    This will serve as a confirmation page to see if your Apache Virtual Host is working.

    Step 10: Enable Virtual Host

    Enable your Virtual Host after creating a file for it, type the following to do that;

    sudo a2ensite wordpress.loc.conf

    Then restart Apache web server so the new settings will take effect;

    sudo service apache2 restart

    You should see similar outputs like these;

    • Restarting web server apache2

    or

    • Restarting web server apache2 AH00558: apache2: Could not reliably determine the server's fully qualified domain name, using 127.0.0.1. Set the 'ServerName' directive globally to suppress this message

    The above sample outputs is harmless, that would be fine.

    Step 11: Test Your Server

    Time to test your Web Server settings, fire up your web browser and type in your server's IP address or the name you map it to.

    If it's working, you should see output like this one;

    Reference Image:

    how-to-setup-a-web-server-virtual-host-working

    If you see it, then pat yourself on the back.

    Method 2: Easy Way

    This is an easy way to create a web server on a VPS, it's a Linux server based on Ubuntu 14.04.

    Step 1 - Signup for a VPS account.

    You need a VPS hosting account from this hosting provider. Signup and make a deposit.

    Step 2 - Create SSH Keys.

    Watch this video on how to create SSH on Windows, while this video if you're on Linux.

    You'll need the .pub file for the next step.

    Step 3 - Create VPS Instance.

    They call a VPS instance as Droplet.

    Click on the Create Droplet button.

    Enter a value for the Droplet Hostname, you can name it like;

    server.mydomain.com

    Select Size - for a startup web site deployment, 10USD/month is recommended. For testing purposes, you may opt for the 5USD/month.

    Select Region - now this depends on you. Choose a location nearest to your target audience. If you're targeting UK traffic, then choose UK data center.

    Select Image - click on the Applications tab and click to choose LAMP on Ubuntu 14.04

    Reference Image:

    building-a-vps-with-lamp-ubuntu-14

    Step 4 - Add SSH Keys

    Copy the contents o your .pub ssh keys, then click + Add SSH Key button. Paste in your copied .pub ssh key.

    Step 5 - Begin Creation

    Click on the Creae Droplet button to start the build process. After this, you will have a working web server on your VPS account.

    Step 6 - Done!

    That's it! The build process takes about a minute. It's the fastest way I can think of, to setup a LAMP server on Ubuntu 14.04.

    Method 3: Automated

    I called this the easy way to set up a web server on Ubuntu 14.04 because everything is automated. With the help of a script, you could put up a web server instance with virtual host or even multiple virtual host in just a few minutes.

    You could use this method to setup a Wordpress instance, or OpenCart, Prestahop and Magento Instances. Almost all known CMS could be set up with this web server script.

    For this method, we'll use Tuxlite -- it is a collection of free shell scripts for fast deployment of LAMP and LNMP stacks (Linux, Apache/Nginx, MySQL and PHP) for Debian and Ubuntu.

    If you're considering upgrading from shared hosting to a VPS or dedicated server then you should use these script to build your own web server without using any costly control panels like CPANEL.

    TuxLite scripts automates configuration of your servers for hosting a website, very ideal for those who are fond of Do-It-Your-Self stuffs.

    The following should be installed when you use this script:

    Apache2 with mpm_event or Nginx MySQL or MariaDB PHP-FPM + commonly used PHP modules Postfix mail server (securely configured to be outgoing only) Varnish cache (optional, not for beginners)

    You could also use this script to provision and seup your own web server locally by creating a Virtual Machine on your localhost. Then connect to it using SSH and run Tuxlite script from there.

    Requirements

    As mentioned in Tuxlite's page, these are the requirements:

    NOTE 3: Ubuntu 14.04 is not officially supported yet as of the time of writing this post. But we'll do some extra steps to make Tuxlite work with Ubuntu 14.04 Server.

    NOTE 4: You may use this script and run it from any any VPS hosting company you'd like.

    Here are few to choose from:

    Start off whenever you think you're ready.

    Step 1: Login to your VPS or VM.

    Launch your favorite terminal emulator and SSH your way in to your server.

    Step 2: Check for updates and Install them.

    sudo apt-get install update && sudo apt-get upgrade

    Step 3: Install Git from the command-line.

    sudo apt-get install git -y

    Step 4: Clone Tuxlite repository from Github.

    Visit the repot page from this link, then copy the https:// link found on the right side of the page. Click on copy to clipboard icon.

    Go back to your command-line and type in git clone then hit single space-bar, and paste in your copied clipboard by clicking on your middle-mouse button or ctrl + shift v using your keyboard.

    You should be ready to enter the command;

    git clone https://github.com/Mins/TuxLite

    Reference Image:

    how-to-setup-a-web-server-git-clone

    You should see similar outputs like these;

    chubbable@ubuntu:~$ git clone https://github.com/Mins/TuxLite
    Cloning into 'TuxLite'...
    remote: Counting objects: 277, done.
    remote: Total 277 (delta 0), reused 0 (delta 0), pack-reused 277
    Receiving objects: 100% (277/277), 102.80 KiB | 37.00 KiB/s, done.
    Resolving deltas: 100% (161/161), done.
    Checking connectivity... done.

    Now if you type in ls, you should see a folder named Tuxlite

    Step 5: Change file permission 700 to all .sh files.

    Navigate inside Tuxlite folder by typing cd Tuxlite.

    Then do

    chmod 700 *.sh

    Step 6: Edit options.conf.

    The options.conf holds the configuration files for the automated setup. You need to setup various parameters in this file like SSH port, MysQL root password, web server to use, database gui to use, hostname and server IP.

    Let's get started with this step, type;

    nano options.conf

    You'll see several parameters there, but for the most important ones are;

    • HOSTNAME
    • HOSTNAME_FQDN
    • SERVER_IP
    • SSHD_PORT
    • WESERVER
    • DBSERVER
    • MYSQL_ROOT_PASSWORD

    Here is a sample of the options.conf file. You may use it as your starting point. I've remove some of the comments to make it a little cleaner.

    
    HOSTNAME=vps1
    HOSTNAME_FQDN=vps1.yourdomain.com
    SERVER_IP="0.0.0.0"
    # Port 22 is the known default SSH port, you may change it.
    SSHD_PORT=2222
    
    ADMIN_EMAIL="[email protected]"
    ROOT_LOGIN=no
    
    CONFIGURE_APT=no
    
    # Nginx = 1, Apache = 2
    WEBSERVER=2
    
    # Oracle MySQL = 1, MariaDB = 2, Percona = 3
    DBSERVER=1
    
    MARIADB_REPO='http://ftp.osuosl.org/pub/mariadb/repo/5.5/'
    MARIADB_REPO_HOSTNAME='ftp.osuosl.org'
    
    USE_NGINX_ORG_REPO=no
    
    # This will be your MySQL root password, username is root.
    MYSQL_ROOT_PASSWORD=YourPassword
    
    # phpMyAdmin = 1, Adminer = 2
    DB_GUI=2
    
    # Set amount of RAM for Varnish cache
    VARNISH_CACHE_SIZE=50M
    # Varnish version. Only used for Debian stable or Ubuntu LTS.
    VARNISH_VER=3.0
    
    #########################################################
    # You may simply use the defaults for the options below #
    #########################################################
    
    # Enable or disable AWStats. Options = yes|no
    AWSTATS_ENABLE=yes
    
    # Enable or disable Git. Options = yes|no
    GIT_ENABLE=no
    
    # Any other packages that you wish to install. Leave empty if nothing more is needed
    # Eg. MISC_PACKAGES="htop dnsutils vim tmux imagemagick"
    MISC_PACKAGES=""
    
    # Configure PHP. Recommended to leave PHP_BASE unchanged
    # You may safely remove all the modules in PHP_EXTRAS
    PHP_BASE="php5-fpm php5-common php-apc php5-mysqlnd php5-dev"
    PHP_EXTRAS="php5-memcache php5-curl php5-mcrypt php5-xsl php5-gd php5-imagick php5-snmp php5-xmlrpc"
    
    # Settings for php.ini
    PHP_MEMORY_LIMIT=96M
    PHP_MAX_EXECUTION_TIME=120
    PHP_MAX_INPUT_TIME=300
    PHP_POST_MAX_SIZE=25M
    PHP_UPLOAD_MAX_FILESIZE=25M
    
    # Settings for PHP5-FPM's pool
    FPM_MAX_CHILDREN=5
    FPM_START_SERVERS=1
    FPM_MIN_SPARE_SERVERS=1
    FPM_MAX_SPARE_SERVERS=2
    FPM_MAX_REQUESTS=5000
    
    # Size of the /tmp folder if you use "tmpdd" instead of "tmpfs". Default is 1GB
    # Increase if you need larger but your free disk space will be reduced accordingly
    TMP_SIZE=1000000
    

    Save the file afer editing, ctrl + o + enter then ctrl + x to exit.

    Now we're ready to execute the install script.

    Step 7: Edit apache2.conf file.

    To make the Apache configuration file compatible with Apache 2.4, we need to change some of the parameters inside the file apache2.conf.

    Thanks to brennebeck & nternetinspired - Github members, for the corrections and commits they've made. They made Tuxlite compatible with Apache 2.4 on Ubuntu 14.04.

    To edit the file, type this;

    sudo nano -c ~/Tuxlite/config/apache2.conf

    Around line 89, change

    LockFile ${APACHE_LOCK_DIR}/accept.lock

    To

    Mutex file:${APACHE_LOCK_DIR} default

    Scroll down around line 201, change;

    Options -Indexes FollowSymLinks

    To

    Options Indexes FollowSymLinks

    Go to bottom-most part of the file, change;

    Include sites-enabled/

    To

    IncludeOptional conf-enabled/

    Then finally, change;

    IncludeOptional sites-enabled/*.conf

    To

    IncludeOptional sites-enabled/

    Save the file and exit the editor.

    Step 8: Execute the install script.

    While sitll inside Tuxlite folder, execute install.sh command as root. To do that you need to enter;

    sudo ./install.sh

    Now grab a beer, sit back and relax while you wait for it to finish. It would probably take some several minutes, depending on your Internet bandwidth or system specs.

    Step 9: Add a Virtual Host.

    A VirtualHost is another host inside a single server. This host provides web services by using resources (processor cycles, memory, storage space & bandwidth) shared by the server.

    A Virtual Host also called vhost is reachable via domain name, with proper DNS settings.

    A multiple Vhost can reside on a single server, virtual or dedicated.

    And with this step, we're going to create a new virtual host called chubbable.dev.

    Using your command-line, go to the Tuxlite folder.

    We're going to create the Virtual Host and at the same time designate it to a user on the server.

    In my case, my username is chubby, and the command should be like this;

    sudo ./domain.sh add chubby chubbable.dev

    You should see similar output like these;

    If everything worked out smoothly, then make a test by pointing your browser to your hostname/domain-name.

    If you're working on a local server, you just have to map the IP address of your hostname/domain name by including it to your hosts file. Do this on your local client computer, not on the server

    To map your server IP address to a domain, edit /etc/hosts file if you're on Linux, while c:\windows\system32\drivers\etc\hosts if you're on Windows (need to set show hidden files).

    Edit the file like the following;

    127.0.0.1 localhost
    127.0.1.1 ubuntu.lan.net ubuntu
    
    # Hostname maps to IP address
    # server.ip.address domain-name
    10.0.0.100  chubbable.dev
    
    # The following lines are desirable for IPv6 capable hosts
    ::1     ip6-localhost ip6-loopback
    fe00::0 ip6-localnet
    ff00::0 ip6-mcastprefix
    ff02::1 ip6-allnodes
    ff02::2 ip6-allrouters

    Save the file and test your virtual host.

    Fire up your browser and point to your domain name, in my case its chubbable.dev.

    Step 10: Enable Database GUI

    We're going install a Database GUI, you could choose to use Adminer or PHPMyAdmin for this. But for this guide, options.conf is set to install PHPMyAdmin.

    To install it, type the following;

    sudo ./setup.sh dbgui

    To enable web access for PHPMyAdmin;

    sudo ./domain.sh dbgui on

    PHPMyAdmin should now be accessible via chubbable.dev/dbgui

    And... That's it! You should now be able to reach PHPMyAdmin GUI using a browser.

    Step 11: Drop your files.

    You can now put your CMS files or scripts to your Virtual Host folder.

    Your Virtual Host foler path is...

    /home/your-user-name/domains/your-domain-name/public_html

    In my case, it's...

    /home/chubby/domains/chubbable.dev/public_html

    And... You're done setting up a web server using Tuxlite.

    Web Server Setup For Testing or Development Environment

    If you ask me how to setup a web server on Windows, the following tutorial should answer your question.

    Method 4: For Windows-based Machines

    Here are 3 easy ways to create a web server on Windows computer. This method is very ideal for web development and practice mode.

    We're gonna be using free softwares that are easy to use and best of all, they are portable. You could store your web server on a external hard drive or usb stick and run it from another computer.

    Method 4-A: Using USBWebserver v8.x

    It is a free software that you could use to build your own web server on localhost. It's very easy to install and configure.

    So let's get started.

    Step 1: Download the latest version of UBBWebserver.
    Step 2: Extract the file to any path you want.

    In my case, I've extracted it on my C:</code> drive.

    Step 3: Launch the software.

    By double-clicking on the usbwebserver.exe file inside the folder path where you extracted the files.

    Step 4: Create a folder for your Virtual Host.

    Create the folder inside the USBWebserver folder, let's say you would want to install Wordpress on this web server. Then you need to create a folder called wordpress.

    Then on the application window, click on Settings tab and change Root dir value from;

    {path}/root

    To

    {path}/wordpress

    Also change Port apache value from 8080 to 80. You may leave the MySQL default value.

    Click save button and then OK to save the changes.

    Step 5: Create a confirmation page.

    Create a new text file inside wordpress folder, or whatever name you put into. Then rename the file and name it index.html. Then enter the follwing and save the file

    Step 6: Test you virtual host.

    By visiting localhost using any web browser you like, you should see a web page like this one;

    Reference Image:

    how-to-setup-a-web-server-usbwebserver-vhost-working

    And that's it!

    Method 4-B: Using XAMPP

    XAMMP contains Apache, MySQL, PHP, Perl.

    It's a popular development environment for Windows-based machines. Many PHP developers and Front-end developers use this stack because it's way too easy to install and configure. Ideal for beginners, self-learners and also experts.

    With XAMPP, you'll be set up and running a web server on Windows in just about a few minutes.

    Let's get started.

    Step 1: Download XAMPP and install it.

    Visit the official download page for XAMPP and get the version you want or what's compatible for your application or CMS script.

    Step 2: Create a folder for your project.

    Make a new folder inside htdocs, this should contain your project files like CMS scripts, web data and pages. This also serve as the folder path for your Virtual Host.

    To access a virtual host or project, point your browser to

    http://localhost/your-project-folder

    Step 3: You're done!

    That's it! You now have a working Windows-based web server using XAMPP.

    To create a database for your project, just point your browser to....

    localhost/phpmyadmin

    OR you may also click the admin button from the XAMPP control panel.

    Some FAQs

    • How to increase PHP memory limit in XAMPP?

      To increase PHP memory limit, you need to edit php.ini file and search for memory_limit=, then enter your desired value. For example, 512M or 1024M. Save the file and restart Apache using XAMPP's control panel.

    • How to increase max execution time in XAMPP?

      To edit other resource limits like max execution time for PHP, edit php.ini file again and search for max_execution_time=, then set your desired value, in seconds.

    • How to increase file upload size limit in XAMPP?

      It's in php.ini again, search for upload_max_filesize= and set desired value. PLUS! Don't forget to change the value for post_max_size

    • Where is php.ini in XAMPP Windows?

      You can find it inside your XAMPP folder, particularly in this location:

      xampp\php\php.ini

    • How to increase file upload size for PHPMyAdmin import?

      Edit php.ini file and change value for post_max_size and upload_max_filesize=, save the file and restart Apache.

    It's a Wrap!

    Those are the different methods on put up an instance of a webserver, either on Windows or Linux-based machines.

    Hope this also answers your question... How To Setup a Web Server on Ubuntu 14.04 Server?. I've stated all the necessary steps in Method 3 part of this post.

    Feel free to choose what method works for you and which one helps you best in your work flow. Take note that Method 3 supports multiple virtual hosts or multiple domains.

    I hope you find this post useful and If you have something to share with me, please feel free to put it in a comment below.

    By the way, I'd like to add some more info about Windows based Web Servers, these softwares are worth mentioning because they are easy to use and fast to deploy. Very handy for some emergency Web Server setup on Windows.

  • How To Setup A Virtual Private Server Using Ubuntu 14.04

    How To Setup A Virtual Private Server Using Ubuntu 14.04

    Are you planning of moving away from your current Shared Web Hosting Company? Or perhaps, your website is getting lots of traffic now and thus, hogging most of the resources shared on your server and that you urgently need to create your own private server for your busy website.

    Jump Links

    Use these short-cut links to go to a specific part of this post:

    Not only that, maybe you're a student or self-learner like myself who is fond of learning things on their own.

    Whatever your reasons are in setting up your own VPS (Virtual Private Server), you could follow this step-by-step guide. I've written this guide in a very noob-friendly way so beginners and self-learners like myself could easily setup and configure their own server on any VPS hosts they like.

    Purpose

    This easy-to-follow tutorial teaches you (in a noob friendly way) how you would install Ubuntu 14.04 Server - TrustyTahr on a newly purchased VPS hosting account. This is a self-managed VPS or other term for it is Un-managed VPS. Others calls it Do-it-yourself or Self-managed VPS.

    I'm not an expert when it comes to provisioning these kind of servers, but I do have lots of experiences in installing and configuring Ubuntu Servers on my Lab Computer and Development Servers like this one. I learned this stuff by myself and I am now promoted from Ubuntu Server Noob to Ubuntu Server Semi-Noob.

    If you own a VPS or Cloud VPS, you have a dedicated resources for your hosting account. Resources like; bandwidth, memory, and storage.

    With VPS, you have your own server resource and your own server. Unlike with shared hosting, where thousand of hosting accounts and web sites are hosted under one server, and shares all the server resources.

    So if you follow and use this guide, you will learn how to build a virtual private server from scratch to finish, which you could use to host several web sites and CMS you'd like. Furthermore, you could also install many applications and open source software like OpenVPN Access Server

    About Virtual Private Servers

    VPS are virtual machines configured as servers.

    If you have used VirtualBox or VMWare, then you should know what a virtual machine is. But those are just for Desktop Computers, not for server

    VPS, like virtual machines or VMs runs on a dedicated machines loaded with HyperVisor.

    The Hypervisor, which is also a software installed on bare-metals or on top of OS (i.e. Linux & Windows) runs those virtual machines and present it as guest machines.

    Example of an Hypervisor is VirtualBox and VMWare, only thing is, those software are classified as Type-2 Hypervisors. Which means, they are installed on top of an Operating System, like Linux - Ubuntu Servers / Desktops.

    Example of Type-1 Hypervisors are; VMWare ESXi & Microsoft Hyper-V.

    Virtual Private Servers are sold by hosting companies as a Service. You are billed monthly, quarterly, semi-annual or annually for hosting your Virtual Machines under one of their hypervisor on their infrastructure.

    Comparing it from a VPS, with Shared Hosting, you are billed for hosting your websites on the Web Host's servers.

    How About Cloud VPS

    To the best of my knowledge, a cloud VPS is just like any other VPS that is hosted on a remote location or infrastructure. The VPS host provides you the means to connect to your server and configure it.

    Unlike ordinary physical server or bare-metal, Cloud VPS's storage is separate from the physical machine where your VPS is hosted on. It's not like you have a virtual machine inside your VirtualBox (or VMWare) where its virtual hard drive is stored in the host's physically attached hard disks.

    With Cloud VPS, your storage or hard drive space is actually on another server called Storage Servers, these type of servers are dedicated to serve storage spaces or virtual hard drives for virtual machines or VPSs. For a cloud hosting company, one Storage Server would not be enough, so they build several and thousands of Storage Servers and then connect them to a network. They call them SAN or Storage Area Network.

    Cloud VPS is scalable which means, you could adjust (scale up) your server resources like memory limit, storage limit or bandwidth limit whenever you feel necessary, with just a button click or set it to auto-scale upon traffic spikes without rebooting. You could also scale it down whenever you feels like to. You could do this using the hosting company's web-based control panel.

    If you have something more to tell about Cloud VPS Hosting, feel free to post your comments on the commenting area of this post.

    Requirements

    Before you start of with this instruction, make sure you already have or done the following:

    • VPS Hosting Account (like these: 1, 2, 3)
    • A Registered Domain Name from NameCheap.com or Register.com (Optional)
    • Created an SSH Key Pairs
    • Terminal App, if on Linux or Mac
    • Putty, if on Windows
    • Any text editor of your choice (Gedit, Notepad++, SublimeText 3)
    • A working Internet Connection

    Setup & Configuration

    Here's now the interesting part, the set up guide and configuration.

    With this guide, I'll be using this VPS provider since I have a current subscription from their service. You could use any Cloud VPS Provider you want, the process is just similar anyways.

    Create A New VPS

    • Step 1: Login to your VPS Control Panel or Web GUI.
    • Step 2: Create a new VPS (or Droplet).

      Click on the Create Droplet button and enter a name for your VPS Host Name. I suggest that you enter the name in this format:

      name.your-domain-name.com

      or

      myvps.chubbable.com

      Select Size of your VPS - You may choose from different combos like how many virtual CPUs, SSD Disk, and bandwidth allowance.

      Reference Image:

      Select Region - scroll down a bit and choose the location of your server that should be hosted at. I suggest that you choose the closest region or country to your target audience. If you want to target UK audiences or user, then choose UK server.

      Reference Image:

      Select Image - Select the Linux Distro that should be use with your VPS. The Create Droplet wizard will install the software for you.

      Add SSH Keys - You really should use an SSH connection with your VPS for a more secure connection. It lets you connect to your server securely without entering a password.

      Copy the contents of your ssh key (i.e. chubbable.pub) and paste it in the text area, name your key and click Add SSH button.

      To learn how to create your SSH keys in Windows, [video_lightbox_youtube video_id=-92wEg68SKQ&rel=0;autoplay=1 width=768 height=432 anchor="watch this YouTube video."]

      Create Droplet - if everything is according to your liking, click on Create Droplet button to initiate the build.

      Sucess!!! - After a successful a VPS creation, you should see a page like this one.

      Reference Image:

    Create A New User

    You need to create a new user account with SUDO privileges, it's a user that belong to sudo group or sudoers.

    You need to have this type of user account, so you could administer your server.

    sudo stands for super do. It's a program built-in to Unix-like operating system, which gives privileges to a user to make any changes to the system.

    • Step 1: Connect to your Server.

      In this step, you need to login to your newly build virtual private server, using SSH connection.

      Fire-up your Terminal app if you're on Linux or Mac, PuTTy if you're on Windows-based machine.

      SSH your way in, by typing this in the command line:

      ssh [email protected]

      Once logged in, your command line environment will change. It should look similar like this one:

      root@myvps:~#

      Note: Your VPS IP address can be found on your web-based control panel.

      Reference Image:

      The # character in your command line tells you that the login name root is a super user, which means you have all the privileges to make changes to your system without being ask for a password. This is dangerous when it comes to public facing servers, because if the server got compromised and someone had break in to your server and got logged in as root user, then s/he could do whatever s/he desires to the system.

      So you need to have another user account and disable the root user login as a precautionary measure in case someone has broken in to your server.

      If in case someone broke in, s/he still needs to know what's your sudo user password is, before s/he could do any changes to your system.

      Let's do the necessary configurations to set the basic SSH security for your VPS.

      See Step 2 below.

    • Step 2: Create the new admin user account.

      Make the user account so you don't have to use the root account when you need to do some changes.

      Ok let's do this, type this in your command-line:

      adduser you-desired-username

      Example:

      adduser chubbable

      Press Enter key and then you should see outputs similar with this one:

      Adding user chubbable' ... Adding new groupchubbable' (1004) ... Adding new user chubbable' (1004) with groupchubbable' ... Creating home directory /home/chubbable' ... Copying files from/etc/skel' ... Enter new UNIX password:

      Now enter your desired password then hit Enter key.

      Note: When you type in your password, it will not show on your screen.

      Next, enter other details for your user account. Just follow what the prompt says.

    • Step 3: Add the user name to the sudoer group.

      Go back to your command-line enter the following:

      usermod -aG sudo chubbable

      Substitue chubbable with your own username.

      The command usermod -aG adds the user name chubbable to the sudo group, that makes user chubabble a sudoer, a user that can make changes to the system, provided s/he enters his/her password and execute every command with sudo prefix.

    • Step 4: Copy the authorized_keys file.


      Note: Your home folder path is located at; /home/your-user-name, While root's home folder is located at /root.

      In addition to that, when logged-in and you see this in your command prompt, this indicates that you are currently at your home folder path:

      youruser-name@vps-host-name:~$

      The ~ character means that, you're currently at your home folder. Prior of moving the file, you need to create the .ssh folder/directory first.


      authorized_keys file is currently located in your VPS at:

      /root/.ssh/authorized_keys

      You have to move it inside your server's home folder, specifically inside:

      /home/your-user-name/.ssh/

      So it would look like this:

      /home/your-user-name/.ssh/authorized_keys

      You need to create the .ssh directory, prior to moving the authorized_keys file.

      To do that, type in:

      mkdir ~/.ssh/

      Note: mkdir in Unix-like OS means make directory or create directory/folder.

      Then type in the following command:

      sudo mv /root/.ssh/authorized_keys ~/.ssh/

      mv command executes to move the authorized_keys file to your designated path.

      Note: In Unix-like OS, any file or folder name that begins with . or dot, is a hidden file/folder.

      Set ownership for the authorized_keys file, since it is currently owned by root user. To do this, type the following and press Enter key.

      sudo chown your-username:your-username ~/.ssh/authorized_keys

      Change folder permission for the folder and file accordingly:

      chmod 700 ~/.ssh/ && chmod 600 ~/.ssh/authorized_keys

      And... done! Proceed to next step below.

    • Step 5: Test your SSH connection.

      Now that you have a sudoer user account, it's time to use it and logout from the root user account and at the same time logout from your server.

      To do just that, type in exit and hit Enter key in your command-line.

      Now, you should be back to your local command-line.

      Log back to your server using your new user account.

      Follow the instruction below.

      To log back in to your VPS, go back to your command-line and type:

      ssh your-new-username@your-vps-ipaddress

      If you got in, then congratulations! You followed the instruction correctly and you had set a password-less SSH authentication.

      Now continue setting up your basic SSH security and follow the steps below.

    Set Basic SSH Security

    Let's do the following procedures for basic SSH Hardening .

    • Step 1: Disable root user login from SSHD config.

      To do that, log back to your server using SSH.

      But this time, instead of typing ssh root@your-vps-ipaddress...

      You should type in...

      ssh [email protected]

      Example:

      ssh [email protected]

      After logging in successfully edit this file:

      /etc/ssh/sshd_config

      Type this in your command-line:

      sudo nano -c /etc/ssh/sshd_config

      Note: nano is a command-line text editor program for Unix-like operating system. i.e; Ubuntu, Debian and Linux Mint.

      Scroll down around line line 28.

      You should see this config:

      PermitRootLogin without-password

      You need to change the without-password value to no.

      Setting it to no prohibits it to login to the system.

      So what is PermitRootLogin without-password means? The without-password config lets the root account to login without a password, just like what it did when you logged in to your VPS for the first time.

      After editing the file, save the changes you did by typing...

      ctrl + o + enter

      o is letter o - as in omega, not zero.

      Then press ctrl + x to exit from the nano text editor.

      Now you have to restart the SSH Daemon to load the changes to the system.

      To do that, type this in your command-line:

      sudo service ssh restart

      Note: Restart command stops and start the SSH Daemon regardless of whether it is already running or not.

    • Step 3: Continue editing the /etc/ssh/sshd_config file and set other SSH security configs.

      Type this in your command-line:

      sudo nano -c /etc/ssh/sshd_config

      Then scroll down around line 52 and change this:

      #PasswordAuthentication yes

      To:

      PasswordAuthentication no

      This disables clear text password authentication when logging-in to your server using SSH. After setting this up, you can only get in to your server using your SSH Keys.

      Other configs you need to change, it should reflect the following configuration:

      X11Forwarding no
      UsePAM no
      UseDNS no
      AllowUsers your-user-name

      Then save the changes.

      You probably know by now how to save a file opened by nano text editor. I mentioned in above. Step 1 of Set Basic SSH Security.

    TCP Wrapper Configuration

    For additional SSH security, set this up so SSH Daemon should only listen and allow connection from a range of IP addresses or specific IP address.

    Basically, what TCP wrapper does is, it determines if a client machine is permitted to connect to a service. In our case, the service is the SSH Daemon.

    It gets its reference from two files, commonly referred to as hosts access files.

    These files are; hosts.allow and hosts.deny and located at:

    • hosts.deny - /etc/hosts.deny
    • hosts.allow - /etc/hosts.allow

    Setting TCP Wrappers up on Ubuntu:

    To configure TCP Wrapper, you need to edit the files. So you need to launch nano` text editor in your ubuntu server command-line and start editing the two files.

    • Step 1 - Edit hosts.allow file first.

      Type in:

      sudo nano /etc/hosts.allow

      You should see similar output like this:

      # /etc/hosts.allow: list of hosts that are 
      allowed to access the system.
      
      # See the manual pages hosts_access(5) and
              hosts_options(5).
      
      #
      # Example: ALL: LOCAL @some_netgroup
      #          ALL: .foobar.edu EXCEPT terminalserver.foobar.edu
      #
      # If you're going to protect the portmapper use the name
      "rpcbind" for the
      
      # daemon name. See rpcbind(8) and rpc.mountd(8)
      for further information.
      #

      Now, enter the necessary configuration to add security to your SSH server.

      Enter the configs like so:

      sshd: 123.456.
      sshd: 124.456.
      sshd: 125.456.
      sshd: 126.456.

      Explanation:

      Notice that I entered 4 entries with the same service name sshd but different IP address pattern (IPv4 addresses).

      What this mean is, you're allowing connection to the sshd service from any client with an IP address range of 123.456.xxx.xxx. Any host or client machine that matches this IP address range shall be allowed to connect. That is the same with 124.456. and also with the rest.

      So if you have an Internet Connection with dynamic IP addresses, you need to know all the IP address range used by your ISP. In my case, I did a Google search to find all IP address pool used by my ISP and entered it in my hosts.allow file.

      If you have a Static Public IP Address, then you should enter that entry like so:

      sshd: xxx.xxx.xxx.xxx

      I learned and studied about TCP Wrapper from this page

    • Step 2 - Edit hosts.deny file.

      Type in:

      sudo nano /etc/hosts.deny

      And create a new entry like so:

      sshd: ALL

      Then save and exit the editor.

      And that was it! You've configured TCP Wrappers on your Ubuntu VPS.

      You don't need to reload or restart anything. It takes effect after saving the file.

      Note: If in case you messed up and cannot login to your server. You may use your hosting control panel by logging in to your Web GUI and access the Web Console menu. You can access your VPs from thereon, by logging in using your username and password.

    Setup Basic Firewall

    It is necessary to setup right away, a basic firewall for your VPS. With this guide, we'll use UFW or Uncomplicated Fire Wall, which is shipped with Ubuntu Server 14.04. It's actually a front-end app for IP Tables.

    UFW is the noob-friendly way of configuring a firewall for your virtual private server.

    Here are the simple steps to configure it.

    Procedure:

    • Step 1 - SSH into your VPS.

    • Step 2 - Enable UFW using command-line.

      sudo ufw enable

    • Step 3 - Set firewall rule.

      Port 22 Firewall Rule:

      sudo ufw allow from any to port 22

      Port 80 Firewall Rule:

      sudo ufw allow from any to port 80

      Port 443 (https) Firewall Rule:

      sudo ufw allow from any to port 443

      And that's it!

      But if you wanted to configure yourself, a more complicated firewall rules, I suggest you use IP TAbles.

    Install Fail2ban

    Perhaps you would ask What the hell is Fail2ban?

    Ugh... Well, to the best of my knowledge, Fail2ban is a software that rejects IP addresses of a host for a specified period of time, it creates a firewall rule to ban a spceciic IP address due to failed attempt to make a brute-force entry to certain services.

    It reads the log files and search for failed entry attempts from a hosts IP Address and then bans than IP address by creating a firewall rule that drops the connection.

    This is very helpful in protecting your SSHD port from being brute-forced. As all *nix users know, that Port 22 is the default port for SSH server.

    Note: You could actually change your SSHD listening port to a non-standard port. Port numbers higher than 1024.

    Installing Fail2ban is easy, so let's start of with the first step below.

    Procedures:

    • Step 1 - Update the system's local package index before installing it.

    Type in the following command. It should install postfix and fail2ban in one command:

    sudo apt-get update && sudo apt-get install fail2ban postfix

    See that? Not that hard right?

    Note: You need Postfix to send email to your desired email address.

    • Step 2 - Configure Fail2ban with your SSH service settings.

    Fail2ban stores its configuration files in the following path:

    /etc/fail2ban/jail.conf

    That file contains the default configuration. You shouldn't touch that ile. You need to copy and name it to jail.local. see reference image below.

    To copy the file and rename it at the same time, do this:

    sudo cp /etc/fail2ban/jail.conf /etc/fail2ban/jail.local

    Once copied, open the file for editing. Type the following and press Enter key:

    sudo nano /etc/fail2ban/jail.local

    Fail2ban Configuration

    The following should be configured, for a basic Ubuntu VPS.

    Edit /etc/fail2ban/jail.local and configure the following:

    • ignoreip
    • bantime
    • findtime
    • maxretry
    • destemail
    • sendername
    • banaction
    • mta
    • action
    • [ssh] section

    Fail2ban Sample Configurations

    Under [DEFAULT] Section:

    [DEFAULT]
    
    ignoreip = 127.0.0.1/8
    bantime  = 600
    findtime = 600
    maxretry = 3
    backend = auto
    usedns = warn

    Under action:

    change from:

    action = %(action_)s

    to:

    action = %(action_mwl)s

    Under [SSH] Section:

    enabled  = true
    port     = ssh
    bantime  = 8600
    filter   = sshd
    logpath  = /var/log/auth.log
    maxretry = 3

    Note: I've overridden the default bantime of 600 seconds to 8600seconds or 24hours. This setting is only applied to SSH. You can change it to a shorter period like 60 seconds if you want to make some tests.

    Save your changes and exit the editor. Then restart Fail2ban service by typing the following:

    sudo service fail2ban restart

    Fail2ban Parameters: Brief Explanation

    These are the most important parameters to setup Fail2ban to secure your server. In this guide, we'll only tackle protecting your SSH server.

    The configs that you see under [DEFAULT] section shall be applied to all services enabled for Fail2ban. Except those configs that are service-specific, which means [DEFAULT] settings shall apply unless they are overridden in in a specific service name (sshd).

    1. Ignore IP - First config you should see under the [DEFAULT] section is ignoreip. You could skip this for now and leave the default value. What this parameter does is, NOT to ban a host or client machine that matches the IP address specified.

    If you have a Static Public IP Address, then just enter it here. But this is a bit trickier to setup if you're on a Dynamic Public IP Address, especially if your ISP uses several IP Address Pools.

    2. Ban Time - The bantime parameter sets how long that a client will be banned when they have failed to authenticate correctly. This is measured in seconds. By default, this is set to 600 seconds, or 10 minutes.

    3. Find Time & Max Retry - These two parameters works in tandem.

    maxretry parameter sets the number of attempt a host or client machine has to authenticate within a time period (defined by findtime), before being banned.

    What this means is... from the first time a client fails to authenticate, s/he still has 2 more attempt to authenticate within 10 minutes or 600 seconds. Countdown starts from the very first authentication failure.

    4. DesteMail / SenderName / MTA - These parameters are for email alerts. If you wish to receive emails whenever Fail2ban bans someone, then you should configure these.

    destemail parameter sets the email address that should receive email alerts, if banning incidents happens . The sendername is the name that should appear in From field of an email. The mta parameter configures what mail software to use to send email. It's either sendmail or mail.

    5. Action - This parameter configures fail2ban and tells what action it should take when it needs to make a ban.

    The value action_ within the action = %(action_)s config is actually defined inside the jail.conf file. Notice the lines after # Action shortcuts.

    • action_ =

    • action_mw =

    • action_mwl =

    The default action is to simply ban the offending host, which is action_.

    6. [SSH] section.

    You need to enable this parameter to configure it with Fail2ban. The deault value is disabled, so change it to enable to turn it on.

    max retry - You could set this to lower number if you want, let's say 3 tries.

    Leave the other sections for now (i.e. apache, dropbear, nginx-http-auth). Since we only need to setup a basic VPS for now.

    Fail2ban Testing

    I know you'd ask How will I know If Fail2ban is working?

    So I've included the following information so you could know if Fail2ban is working or not. Take note that in this guide, we only configured Fail2ban with SSH access.

    So this is what you should do if Fail2ban is working with your SSH access.

    Procedure:

    • Step 1 Edit /etc/fail2ban/jail.local.

    Go to destemail and set it like so:

    destemail = root@localhost, [email protected]

    Of course you need to enter your real email address instead of:

    [email protected]

    Next, go to action = and edit the line to reflect like the following:

    action = %(action_mwl)s

    Next, go to [SSH] section and set parameter value like so:

    enabled  = true
    port     = ssh
    bantime  = 60
    filter   = sshd
    logpath  = /var/log/auth.log
    maxretry = 2

    Save the file and exit the editor, then restart Fail2ban:

    sudo service fail2ban restart

    • Step 2 - Exit from your SSH session.

    Login again using SSH, and this time you need to use a false user information.

    You could do so like entering the following:

    ssh wrong-username@your-vps-ipaddress

    You should get a connection error for using the working login credential.

    You should see error like this one:

    Permission denied (publickey).

    Note that you only have 2 maxretries, you should get banned for he 2nd unsuccessul login.

    For the third login retry, you should see error like this one:

    ssh: connect to host xxx.xxx.xxx.xxx port 22: Connection refused

    That indicates that your host's IP address has been already banned from accessing SSH.

    You should now receive an email coming from your VPS, with the following email subject:

    [Fail2Ban] ssh: banned xxx.xxx.xxx.xxxx from hostname.domain.tld

    If you receive the email, then you successfully configured Fail2ban with your SSH server.

    Another method to know if Fail2ban is working is by checking the log file. Login to your VPS and check fail2ban.log file.

    You can check that out by entering this command:

    sudo cat /var/log/fail2ban.log

    You should see similar outputs like these:

    fail2ban.jail : INFO Jail 'ssh' started fail2ban.actions: WARNING [ssh] Ban xxx.xxx.xxx.xxx

    The IP xxx.xxx.xxx.xxx has just been banned by Fail2Ban after 2 attempts against ssh.\n\n Here are more information about 1xxx.xxx.xxx.xxx:\n /usr/bin/whois 112.198.64.70 \n\n Lines containing IP:xxx.xxx.xxx.xxx in /var/log/auth.log\n grep '<xxx.xxx.xxx.xxx>' /var/log/auth.log\n\n Regards,\n

    And that's it! That answers your question "How to know if Fail2ban is working?"

    Pointing Your Domain Name To Your VPS

    Now I've got myself a new VPS, but... How am I supposed to direct my domain name to my VPS?

    For a VPS-noob like me, I've asked the same question before. And the answer to that question is to configure your DNS settings from your Domain Name Registrars's Control Panel and Nameservers from your VPS host's Control Panel.

    So how do we point a domain name to a Virtual Private Server?

    Follow the general steps below, it would generally work for most Domain Name Registrars and VPS Hosts.

    Procedure:

    • Step 1 - Login to your Domain Name Registrar's control panel.

    • Step 2 - Find your DNS settings menu.

      Modify the settings that has something to do with name servers. Find for labels like NS1 or DNS1.

      You should modify 3 fields; ns1 or dns1, ns2 or dns2 and ns3 or dns3

    • Step 3 - Get Name Server information from your VPS Host.

      If you're on a VPS Host like this one, you can get the info from this link.

    • Step 4 - Enter the NameServer details in your control panel (Domain Registrar's side), and save your changes.

    • Step 5 - Login to your VPS Host account.

      Go to your DNS settings menu and create the following record types:

      • A Record - You need to create 2 records of this type.

        A Record 1 - Enter your VPS name and it's IP address. A Record 2 - Enter character @ and your VPS IP address.

      • CNAME Record

        Enter * for the name and mysite.dev. for the hostname.

      • NS Record - Enter your VPS host's name servers.

        Example:

        ns1.vpshost.com. ns2.vpshost.com. ns3.vpshost.com.

      Note: Make sure you include those trailing dots (.).

    • Step 6 - Save your settings.

      Wait for a few minutes before trying to access your domain name (if your already have a webserver up and running). It may take some time for the new settings to propagate.

      To test your settings without a web-server yet, search for DNS checker tools on the Internet or use an online tool like this one.

    It's a Wrap

    If you followed this guide carefully, then you should now have a VPS. But if it's not the case, feel free to ask for help by posting your comments below.

    In case you're an expert on this topic, and stumpled upon this post, I encourage you to post some tips and talk about your experiences virtual server provisioning and set-up.

    If you have questions, sugestions, and clarifications, please post them in the comment section below. I will try my best to read and answer them.

    I hope this post answered your question "How To Setup My Own VPS Using Ubuntu Server 14.04?"